Mark and Joe started early as usual, showing up at my house around 7:45. They are really moving quickly now that the layout has been established.
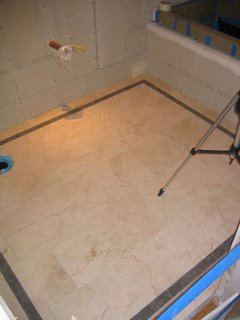
Here is the current view of their progress. Shower surround and shampoo niche starting to look good.
Wall has field tile and base tile in place, just need to put on the chair rail cap. The holes are for the faucet.
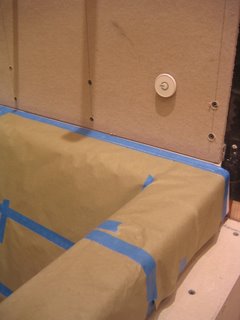
I couldn't help but try to get an early preview of what the volume control knobs would look like against the tile.
Tuesday, June 27, 2006
Monday, June 26, 2006
Tile starts.. hip hip something!
Mark, the tile guy started with the installation of the Nu-Heat floor warming mat. It's going to be totally killer to have a warm stone floor on those cold San Francisco days.... since that's about every day!
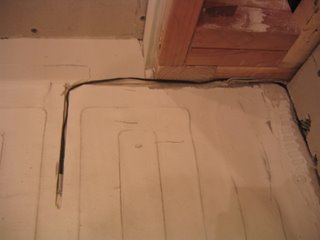
This is the detail of the thermostat probe installed into the morter bed. Nice job cutting a notch for the probe so that it sits level and the tile will lay nice and flat. The other wires are part of the heating mat and have already been installed and then morter applied on top.
Mark knows the in's and out's of all this which has been great. He even knew about the card for the Nu-Heat floor that needs to be signed at three steps during the installation. If you miss one of these checks... the warranty is void. yikes! Good to do it right the first time and have coverage just in case something doesn't work... which means pulling up the floor to fix it! Unlike my failed attempt with the contractor at the onset of this job.... in this case I finally feel like it's good to have a pro doing the work. That's about it for day one of the tile installation, not much else you can do except for waiting on things to dry.
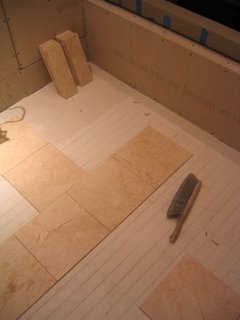
The second day consisted of installing the floor tile. The first step is to cut and lay it all out.
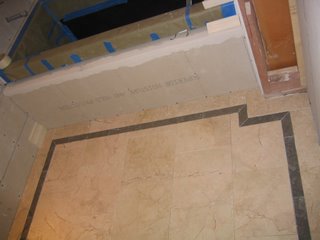
Here is the floor after about a days worth of work. All the floor tile has been cut and installed. Not too bad for one day... this guy is fast!
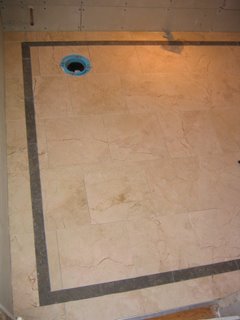
Another angle of the floor. The blue ring is the "water closet flange" It's great that its official name is something so elaborate.. why not just toilet connector or something like that.... :)
One more shot for good measure!
Sanding Drywall.. it's can get dusty.. start to install moulding
Finished up the drywall with 3 coats of mud and then sanding. I have hear of dustless methods of sanding, or wet sanding.. but I just wanted to get it done. All the sanding only took about 1 or 2 hours, but the results are very dusy.. yuck I hate this part.
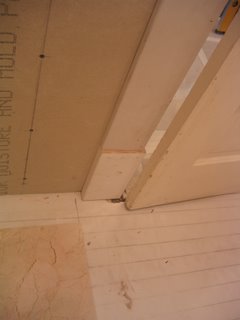
After the sanding I started the mouldings. It was necessary to get the moudlings done around the doorway and one of the windows to have something for the tile guy to butt up against. In the case of the window, I wanted to be sure that there was sufficient room between the bullnosed edge of tile in the shower and the moudlings around the windows.
I have done lots of moudlings already on the house so this is just a matter of matching what is already done in the rest of the house.
Here is the door detail.
and this is the window detail. Just one more window to go and then the crown. One of the most important steps to finishing off the mouldings is to fill all the holes with a wood putty and also caulk all the gaps to create a clean and solid look. It's amazing the difference that a bit of caulking can make to the overall look and quality of the project.
I splurged a bit on this buy purchasing a new miter saw. After lots of research and going to the store to try out a few models I decided on teh Bosch 4410L. It's a 10" slide saw with a laser guide. My old miter saw is just about dead and it's about as no frills as you can get. It does get the job done, but since it's just a 10" fixed miter, it doesn't do well with any lumber that it much wider than 4 1/2" in width. It's even worse when trying to deal with crown that should be cut at the installation angle in the saw. Flipping the wood and doing a double cut takes lots of time and usually yeilds an imperfect cut.
Thursday, June 22, 2006
Went to NYC...
Jenny and I went to NYC so needless to say that status of things on the bathroom haven't changed in a while. NYC was great, busy, vibrant, fun, lots of great things going on everywhere... it was hot!! really hot!! yikes! When do we go back??
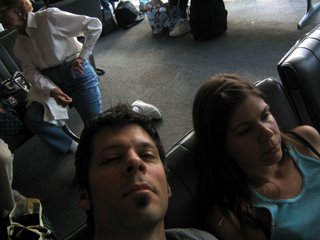
Some of the highlights of our trip included mayhem at the airport. We have mad mullet hair in front of us and behind was two crazy couples yelling to each other about how to use a cellphone and why men take less room in a suitcases than women. The guy kept saying "it's what you make of it... it's what you make of it..."
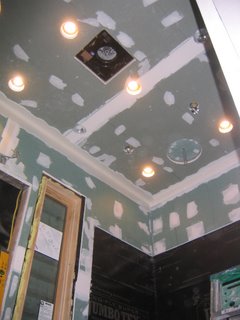
I did a bit more mudding and am getting close to 3 coats on the whole room. It's amazing how long the little details take. The little light slit area along with the recessed circle over the rain shower have taken so much time! So many corners and edges to detail out... The goal is to finish up on the mudding and sanding over the weekend and get all the drywall primed!
Another small issue that I ran into was with the rain shower extension. I ordered this from homeannex.com, the best prices with no shipping on orders over 75 bucks and no tax! Double check on all lead times when ordering. If you ask, they will tell you about how long things should take. They told me this item would take 2 weeks and it arrived in about a week. Wow! This was actually ahead of schedule.. that never happens! I went with the opella brand and upon it's arriving realized that it is a 3/4" pipe and not 1/2" uggg... I had roughed in the plumbing for the rain shower using a transition from 3/4" to 1/2" at the very top and finished off with a 1/2" ipc 90. The hans-grohe rain shower head is configured for 1/2" so I thought that this was the way to go. Opella also makes a 3/4" to 1/2" transition piece for the end of the rain shower extension kit. hmmmm.... I wish that I knew this earlier. I would have just roughed in the whole thing using 3/4" and finishing off with a 3/4" ipc 90. This would deliver the most water and the best shower. Now I have a few options to get this all working... will see how it goes and show the details later.
oh yeah.. the tile guy is really supposed to start tomorrow morning! for real!
Sunday, June 04, 2006
finished tub soffet and added the dot controller
Just had about a 1/2 of a day to work today.
I got the tub soffet done and also added the dot control for the jacuzzi tub.
Here is the tub finally installed with tile flange, caulked and sealed. I covered up the tub so that it won't get any scratches during the rest of the project. The shampoo niche is also installed.
Another angle of the tub / shower area. The soffet in the front of the tub is also now done and ready for tile.
Here is the detail of the dot controller for the jacuzzi tub. I should have installed this much earlier as it was a bit difficult to run the wires at this point in the process. I was thinking that it would be installed on the exterior of the shower, but then decided it would be nice to have access to the controls while in the bath.
Everything is really close to being ready for the tile contractor. I hope that he can start this coming week. He said that it should take about 5 days to do all the tile work. I think that it's going to take much longer, but we will see! I'm not doing the work, so they can take as long as they want. :) Part of the tile installation also includes a Nu-Heat floor warming system. This will be super nice to have warm tile in the morning!
drywall in... cement board starts... mud / tape starts..
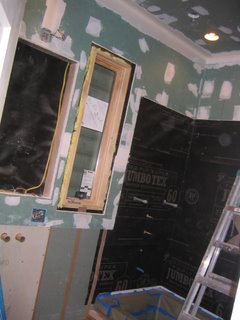
This is probably about 2 days of work since my last post and now the drywall is all in, and the hardi-board is also in. Finally glad to get all this work done which means that the tile guys can come and start their work asap!
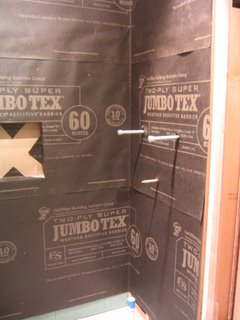
Here is the shower area, very important to put a layer of construction paper, or moisture barrier before installing the hardi-board. In this case I used the jumbo tex 60 min. just tack it into place with some staples. Always use a 4" to 6" overlap between sheets! Overlap in the correct order.... top piece over bottom piece.
I also added some construction adhesive between the drywall and hardi-board layers. This is probably overkill, but this really makes for a strong solid bond.
I got a jump on the mud and tape stage. Here is what the first coat looks like on the ceiling and part of the walls.
The tub is in! This is the last and final time... no more taking it back out. We installed a tile-flange around the exterior rim of the tub to add an extra layer of protection so that no water can get under the tile. A bead of silicon caulking was also applied to the tile flange to adhere it against the wall.
Subscribe to:
Posts (Atom)