Well, we have to start putting up the ceiling which is quite a bit of work, it's got sound absorbing materials and multiple layers / materials etc.. so that it helps reduce noise down here in the lower apartment. The good thing is that I have done this before so I know what I am doing. :)
Here is the plan:
Ceiling is already insulated.. that's one thing that we don't have to worry about today. YES!
Install the framing for the recessed circular detail above the rain shower. I added this detail to the drawings a while back. This should really nice as it's just a recessed 12" circular detail centered above the rainshower in the ceiling. Cut out a circle in a piece of 1/2" plywood and screw this into the ceiling joists. This will provide a guide as well as a place to attach the drywall. It's going to look ulta sweet!
 Install Resilient Channel or RC-1. Bascially this stuff disconnects the joists from the drywall by attaching the drywall to the RC-1 and not directly to the joists. This lessens the sound transmission and impact noise from the upstairs condo. So this picture shows the RC-1 and keep in mind that it's upside down in the pic. It screws into the joists spaced approx. every 24". It always installed perpendicular to the joists. Sometimes it's not possible to space it exactly 24" and this is the case with my ceiling as I have lots and lots of recessed lighting. I got it close enough though...
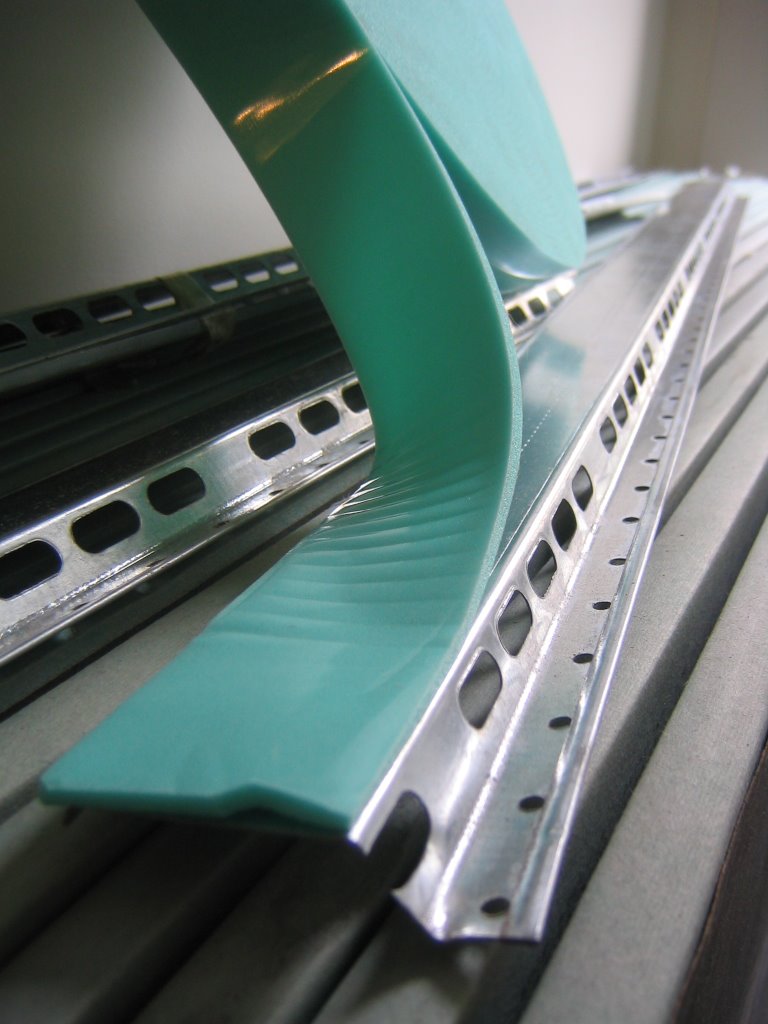 Install a sound absorbing adhesive foam strip to the RC-1. Ok, you can guess that this is super easy! Please note that this is just a demo pic.. it's upside down and in my case, the RC-1 was already installed in the ceiling when I did this step. This product is purchased separately and is "supposed" to help quite a bit. What the heck, it probably can't hurt?
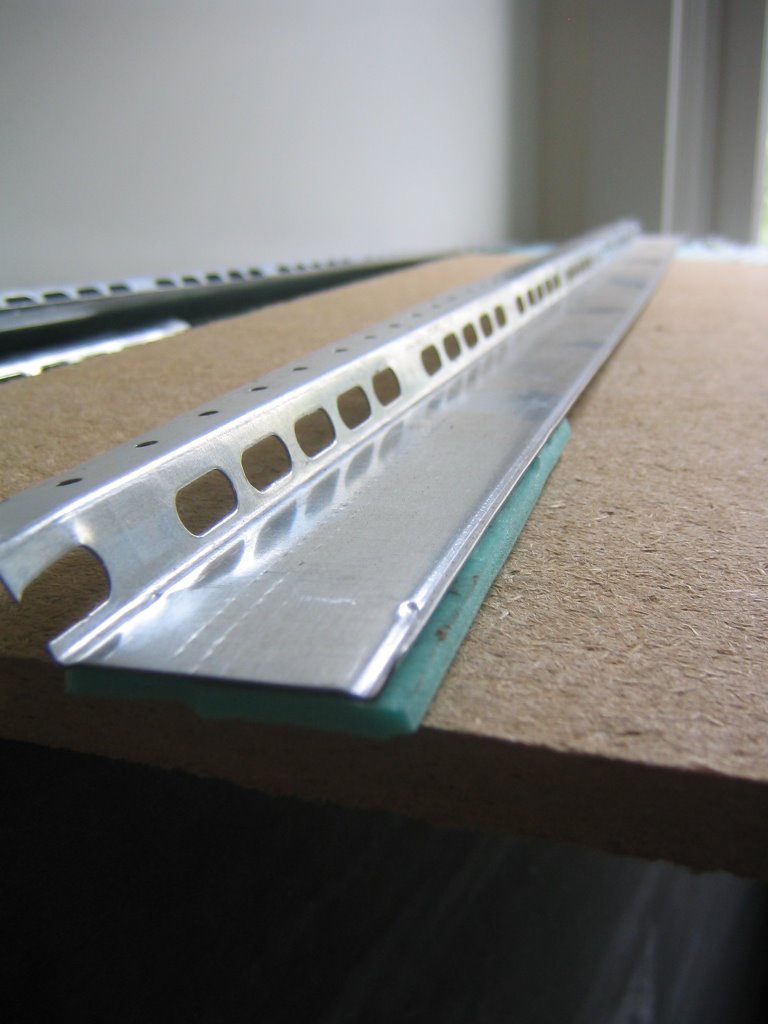 Put up the 1/2" sound absorbing board. This gets cut just like gypsum board, but not quite as easy as it's fiberous material that must be cut all the way through. Can't snap it...Not too bad though... really dusty so wear the mask and use a new matte knife to make it as easy as possible. Here is another demo picture just so no one is confused. This shows the correct orientation of the RC-1 Channel with the foam strip and the 1/2" sound absorbing board underneath. Now just use your imagination and see it all up on the ceiling.
Here ya go. Oh yeah.. use fine threaded drywall screws and make sure they are just the right length. Long enough to grab the RC-1, but not too long! If they touch the joists, the wholepoint is shot.
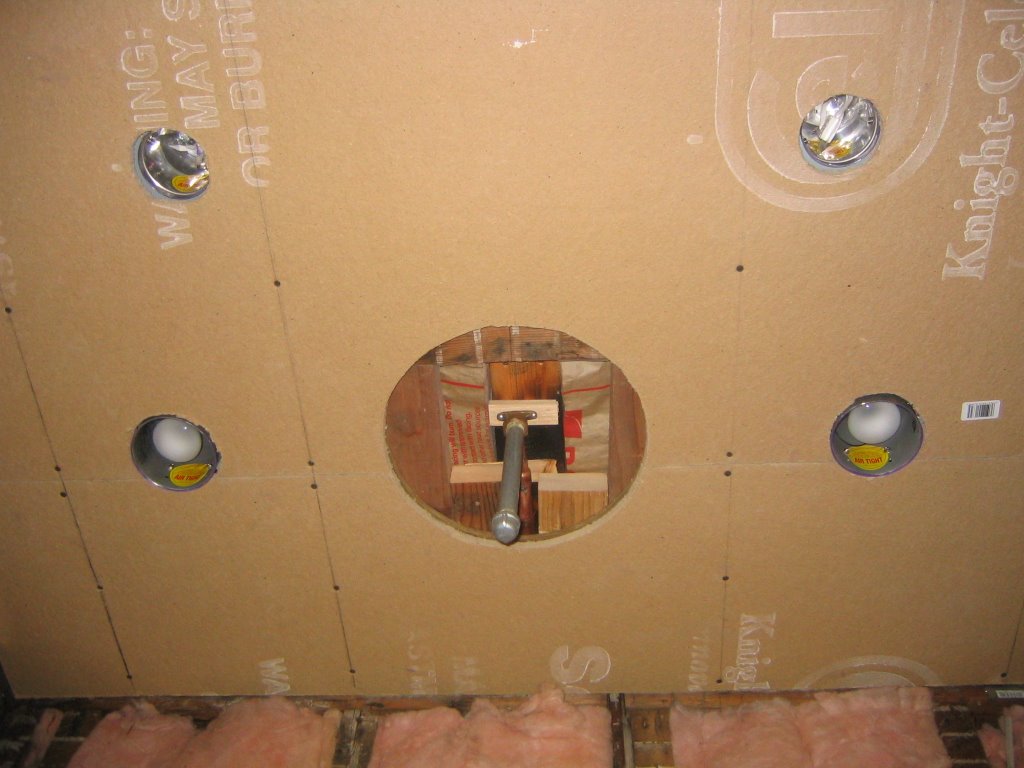 Here you can see the rain head shower detail, might give you a vibe on what I am getting at.
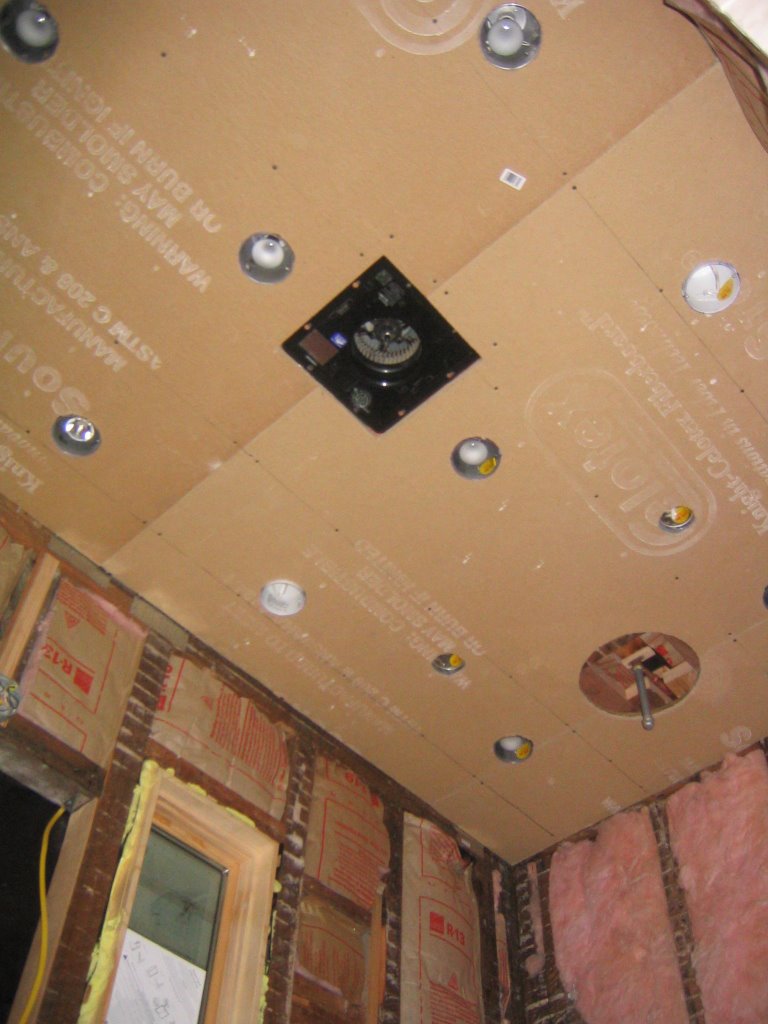 The square cutout is just the exhaust fan rough open.
That's it for today.. next day will be putting up the 5/8" CoreX Green board... and that stuff is heavy! Gotta get some rest!
Oh yeah... Thanks for the yummi sandwiches Jenny! The day always goes better when my girlfriend brings sandwiches for lunch!! Jorge says thanks too!


No comments:
Post a Comment