Sunday, May 21, 2006

Drywall going in... and Ouch!


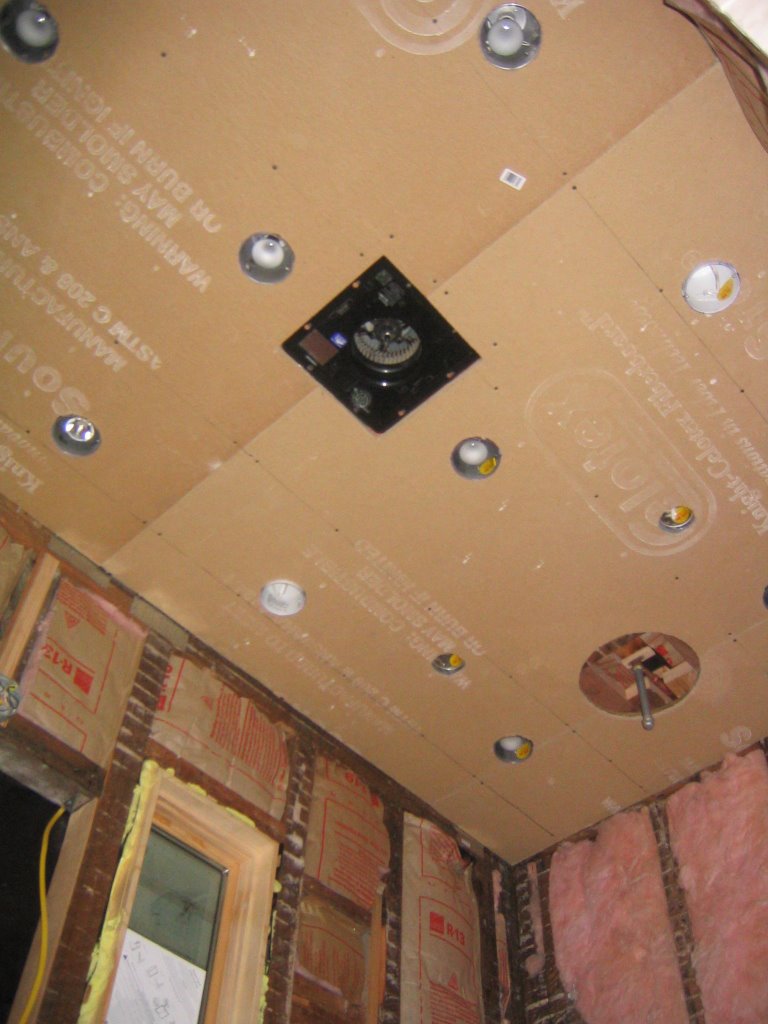
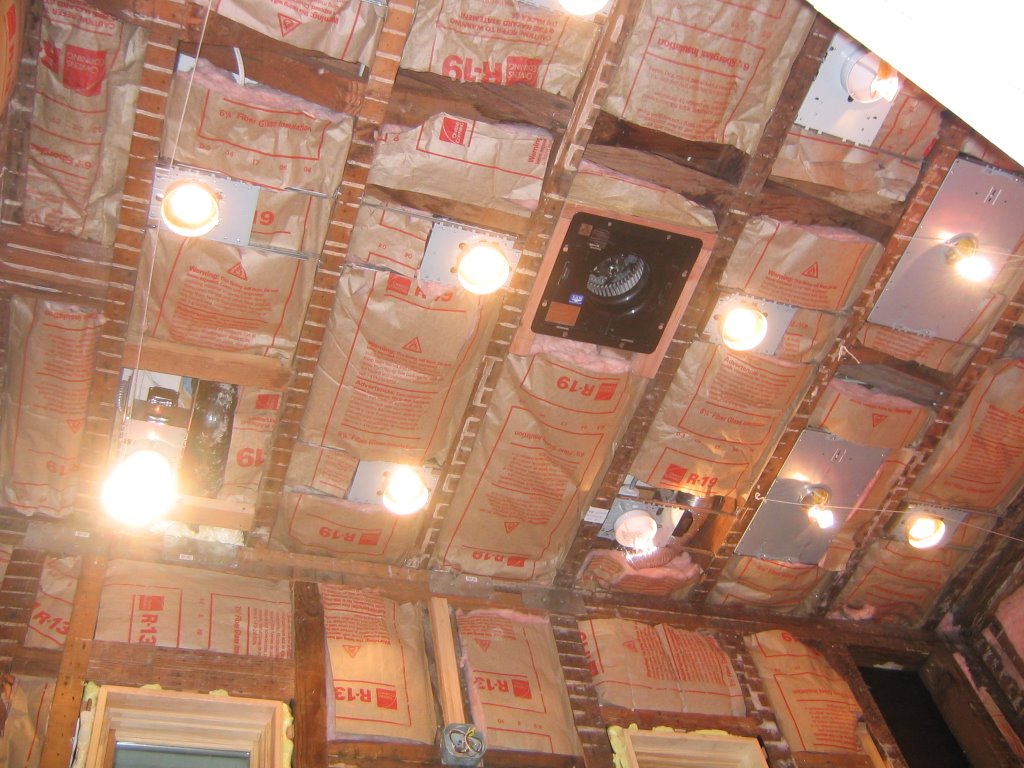
Took a few additional days off from work. Put in a few solid days of work and got quite a bit acomplished. Started the day off by installing the 5/8" drywall on the ceiling. Always do the ceiling first as the walls will butt up against the ceiling and help support it a bit. This was more work than anticipated due to all the recessed can lights. These take a bit to mark and cut out and ensure that they are in the right place. My technique for doing this is to use some chalk to mark each can light, then put up the drywall and put some pressure on it to transfer the chalk marking to the underside of the drywall. Just take down the drywall and you can see exactly where each hole should be cut. Here is the ceiling ready for mud and tape.

The walls are next.... The North and West facing walls require multiple sheets of drywall to ensure the correct thickness as well as keep the 2 hour fire rating adjacent to the property line.

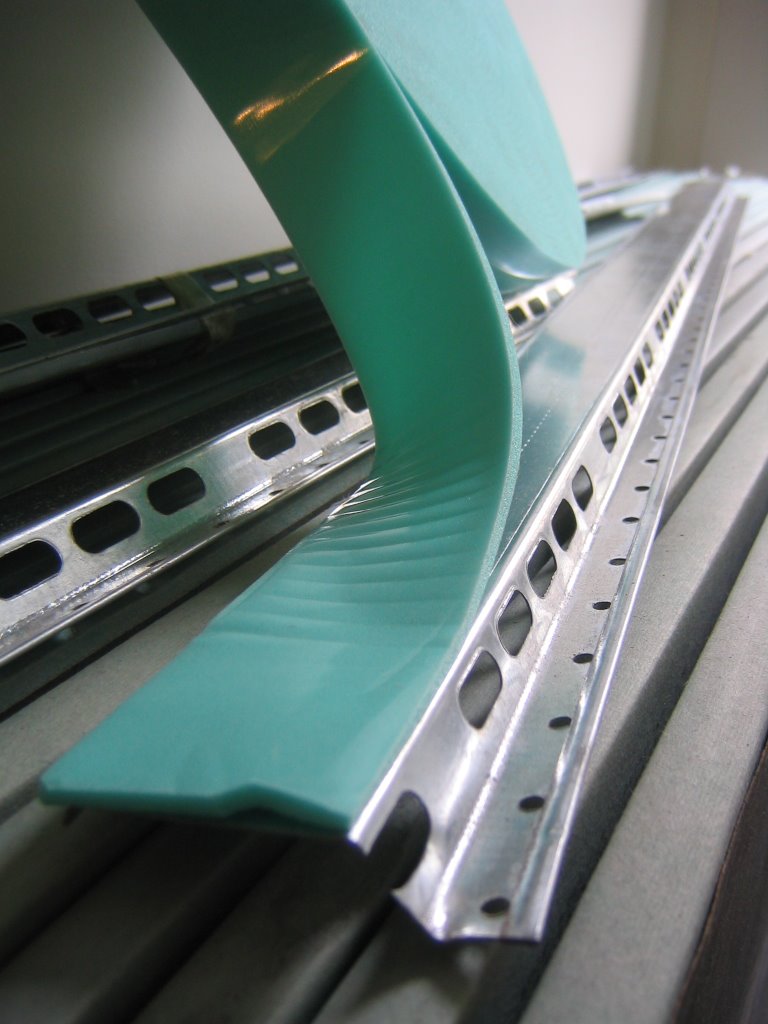
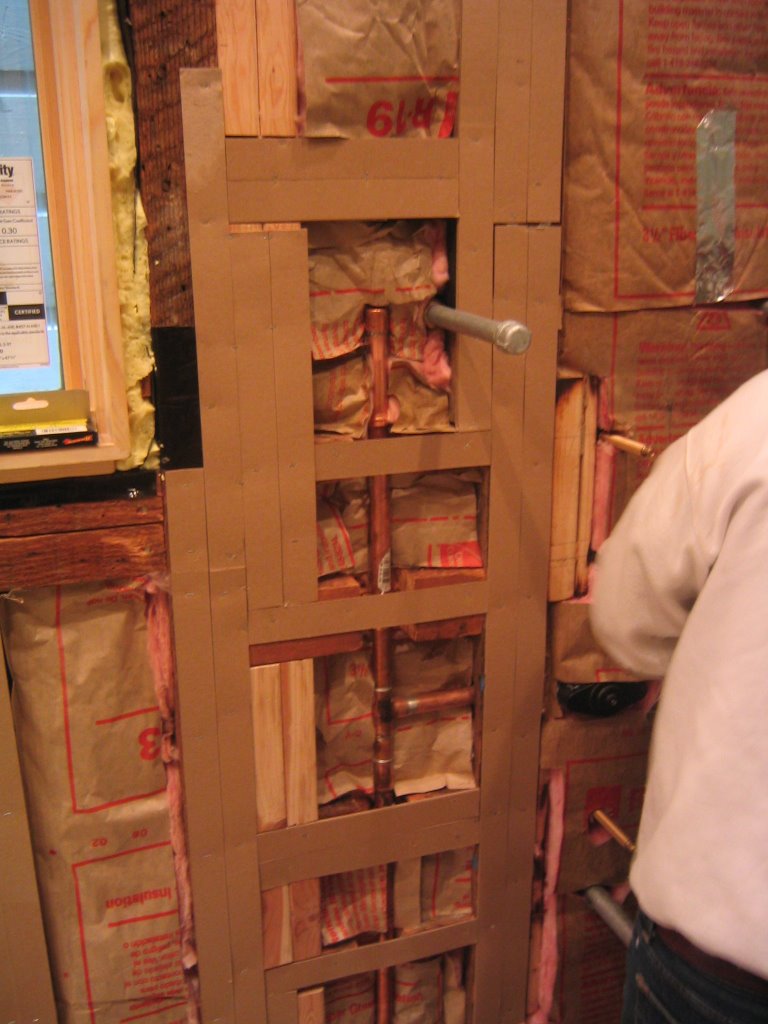
There was quite a bit of shimming required to ensure that the studs are all correctly alligned. Here is Jorge applying paper furring strips in the shower area. This is a really important step in the process.. it takes a bit of additional time to make sure things are all lined up but saves lots of issues in the end. Installing drywall into misaligned studs can not only lead to things being not being straight, but also cause the drywall to break when screwing it in.
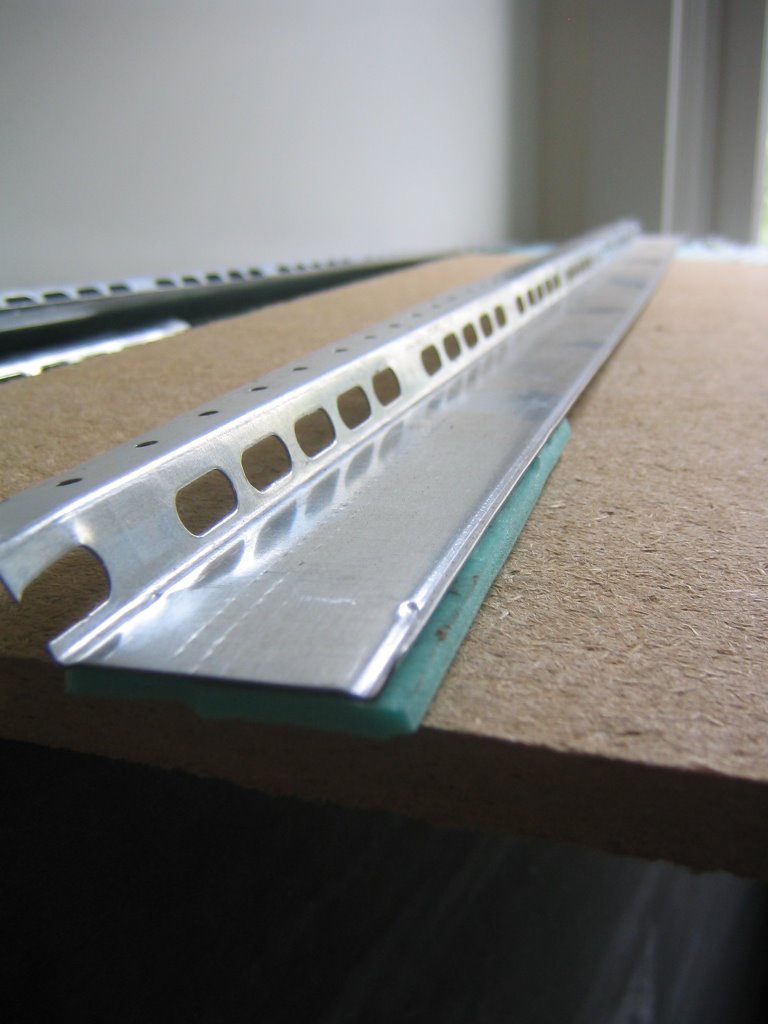
More shimming.....

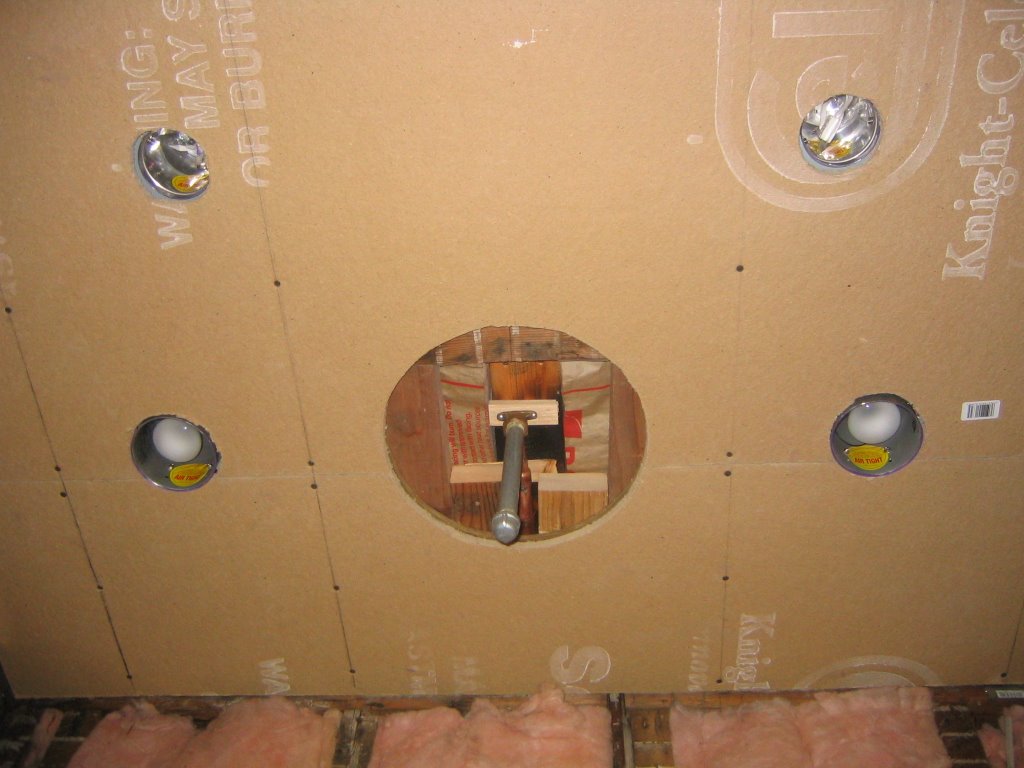
The cutout in the center of the windows is ready for the installation of the mirror / medicine 
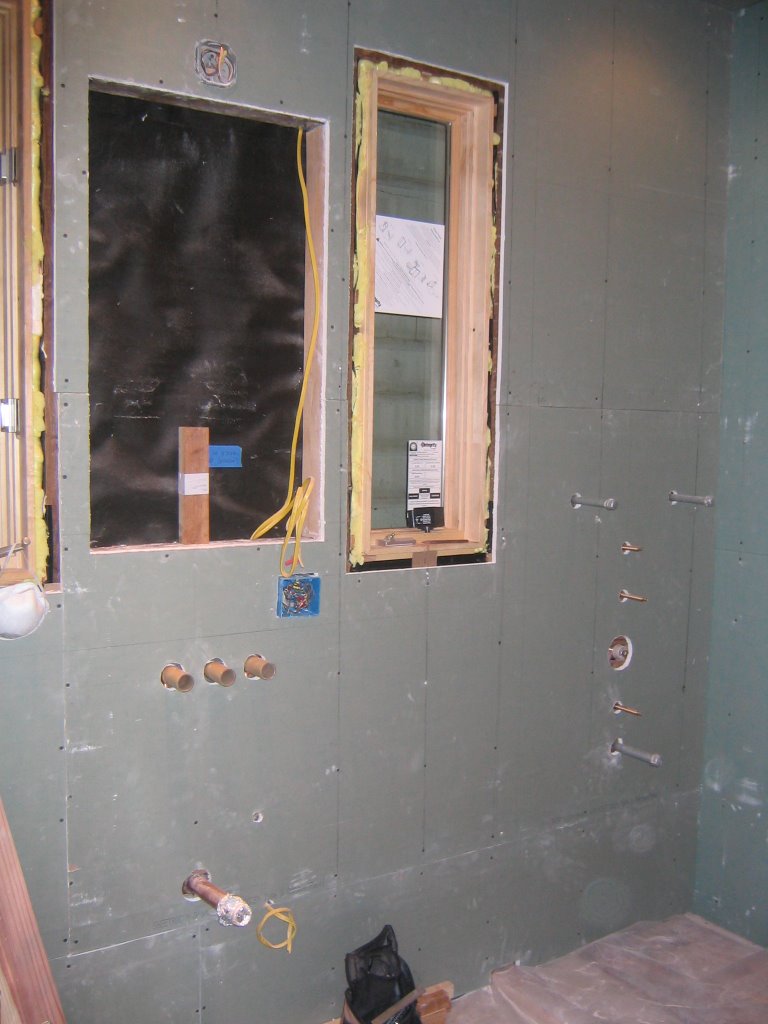
cabinet. This cabinet is huge and it's 4" deep so it will provide lots of good storage space.

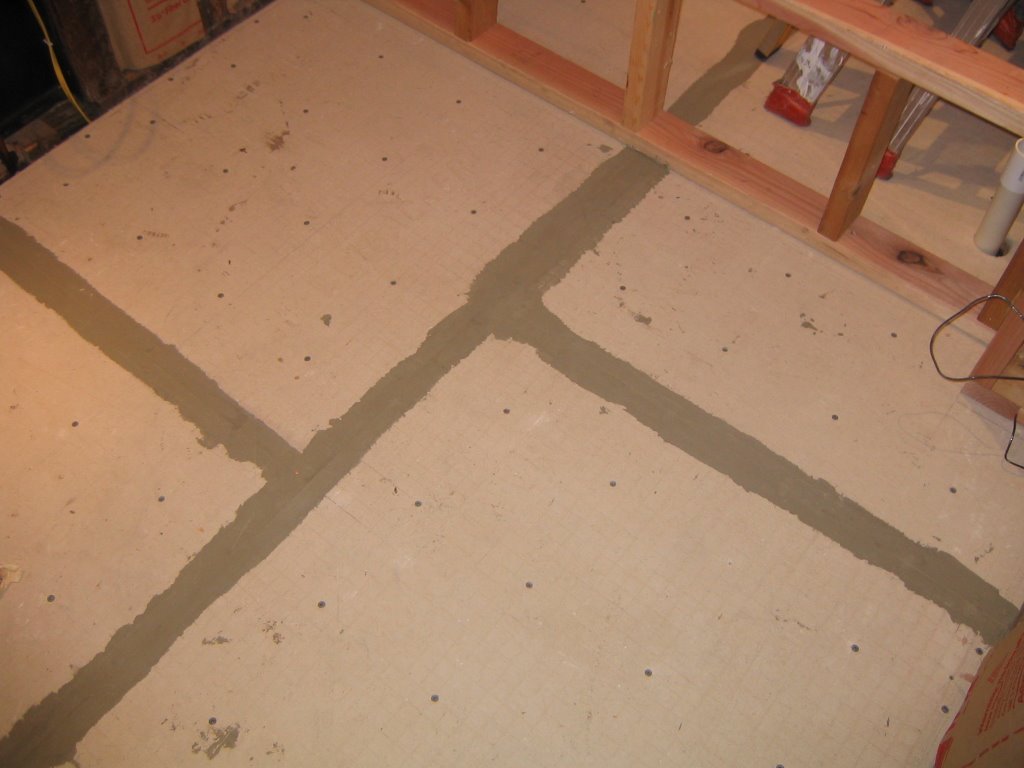
The next step will be to install all the cement board which serves as solid backing for the tile installation. I hope to get that started later this week.

Best purchase yet! I got this Bosch18V hammer drill from a seller on Ebay. It was a really good deal and worth every penny. I started using it and immediately it made my DeWalt 12V drill feel like a little toy. This is heavy, well built, powerfull and holds a charge all day long. I'm looking forward to trying it out on the cement board installation as that will be a good test to see how much abuse it can endure.

Stupid move of the week goes to me! I cut my finger while using a pair of scissors! Be carefull space travelers.. even sissors can do some serious damage.

Sunday, May 14, 2006

Weekend Continues... Acoustical ceiling installation starts.

Sunday Jorge is helping me out but I feel like my nose is about to fall off my face. I think that all this dust and stuff is starting to catch up with me... I can't breath out of my nose at all! YUCK!

Well, we have to start putting up the ceiling which is quite a bit of work, it's got sound absorbing materials and multiple layers / materials etc.. so that it helps reduce noise down here in the lower apartment. The good thing is that I have done this before so I know what I am doing. :)

Here is the plan:

Ceiling is already insulated.. that's one thing that we don't have to worry about today. YES!

Install the framing for the recessed circular detail above the rain shower. I added this detail to the drawings a while back. This should really nice as it's just a recessed 12" circular detail centered above the rainshower in the ceiling. Cut out a circle in a piece of 1/2" plywood and screw this into the ceiling joists. This will provide a guide as well as a place to attach the drywall. It's going to look ulta sweet!

Install Resilient Channel or RC-1. Bascially this stuff disconnects the joists from the drywall by attaching the drywall to the RC-1 and not directly to the joists. This lessens the sound transmission and impact noise from the upstairs condo. So this picture shows the RC-1 and keep in mind that it's upside down in the pic. It screws into the joists spaced approx. every 24". It always installed perpendicular to the joists. Sometimes it's not possible to space it exactly 24" and this is the case with my ceiling as I have lots and lots of recessed lighting. I got it close enough though...

Install a sound absorbing adhesive foam strip to the RC-1. Ok, you can guess that this is super easy! Please note that this is just a demo pic.. it's upside down and in my case, the RC-1 was already installed in the ceiling when I did this step. This product is purchased separately and is "supposed" to help quite a bit. What the heck, it probably can't hurt?

Put up the 1/2" sound absorbing board. This gets cut just like gypsum board, but not quite as easy as it's fiberous material that must be cut all the way through. Can't snap it...Not too bad though... really dusty so wear the mask and use a new matte knife to make it as easy as possible. Here is another demo picture just so no one is confused. This shows the correct orientation of the RC-1 Channel with the foam strip and the 1/2" sound absorbing board underneath. Now just use your imagination and see it all up on the ceiling.

Here ya go. Oh yeah.. use fine threaded drywall screws and make sure they are just the right length. Long enough to grab the RC-1, but not too long! If they touch the joists, the wholepoint is shot.

Here you can see the rain head shower detail, might give you a vibe on what I am getting at.

The square cutout is just the exhaust fan rough open.

That's it for today.. next day will be putting up the 5/8" CoreX Green board... and that stuff is heavy! Gotta get some rest!

Oh yeah... Thanks for the yummi sandwiches Jenny! The day always goes better when my girlfriend brings sandwiches for lunch!! Jorge says thanks too!

Another weekend... 1/2 day of plumber on Saturday

The plumber Phillip got drunk or something on Friday night which delayed his arrival on Saturday until much later than expected. Hey.. it can happen to the best of them and Phillip has totally kicked ass for me... so no worries.. it's all good. We are almost done, just need to hook up the trap for the tub and make sure that there are no leaks. Also need to fix one of the connectors to the volume control as it's leaking a bit. Here is the all waste lines and toilet closet flange, it's mostly all new stuff.

Note to self, or others who are interested: When connecting plumbing pipes that have threads, always adhere to the following rules. A. Use lots of tape on male threaded pieces.... about 5 - 7 turns of this stuff. B. Use lots of pipe dope on both male and female threaded pices. C. Tighten beyond what you think is tight! Use something to give more leverage like adding a long piece of temporary pipe. Failure to do this can result in leaky connections that are hell to fix once all connections are soldered.

Unfortunately this is what happened and we had to take some of the connections apart and fix and then solder again.

Phillip finished everything up in exactly 2 hours. Even with a hangover, he rocks!

In total, it took about 3 days plus an additional 2 hour day to get all the plumbing hooked up and all the waste lines run. Only about 1 more day to finish up and install all the fixtures and sink trap, but that's much later after the room is done and tile is all in.

Here are the finished connections for part of the shower. It was quite a bit of work and then more tweaking to be sure that it's all straight, centered, lined up.

Tuesday, May 09, 2006

CLEAN Deeps!


Depot escaped and then came back all dirty.. not sure what happened exactly, but I decided to give her a bath and get her all clean and fluffy! I don't think that she is too happy about what is going on.

She was really good though.... didn't really fight it, just made some weird howling sounds every once in a while. She was glad when that was over!

Plumbing is not fun!

Things are ready for the plumbing work to start. I have designed a complicated shower system, so I assuming that this is going to be a bit tricky.

Larry my plumber friend from R&L Plumbing hooked me up with one of his plumber friends Phillip. I gave Phillip a call to see if he could start on the work to coincide with my day off from work. It's a good situation as I am able to pay Phillip directly for his work and get his personal rate vs. the inflated rates that would normally be paid directly to a plumbing company. I am also going to help out with all the plumbing work and my rate is totally affordable! :) I'm a good helper so I'm hoping that we can get all the work done in a day or so.

I was totally wrong with my time estimates for the amount of work required. Phillip and I worked Thurs, Friday, Saturday and still didn't finish. There was just so much work to do here. After looking at the situation he decided to cut out a big portion of the old waste lines to connect the new stuff much easier and cleaner.

Got the closet flange / toilet waste line in the correct position now!

All the new plumbing was lots and lots of work to figure out and to get soldered in place. Bascially it was like a puzzle and to get it finished took tons of time! The shower consists of an overhead rain shower as well as 4 body sprays, tub spout, volume contols, and thermostat. Getting all of this to fit inside the wall and to get all the holes in the right place was a serious challange.

A side effect of all this work is that my house is starting to look like a bomb went off. Here is my hallway during the plumbing work. UGG!
Ok..Ok.. Alright..Alright.. I'm way behind on my posts.. but that's because I have been really busy!!

So over the past few weeks.. things have progressed quite a bit. After Howie took care of the electrial work, all in one day! That was fast! Jorge and I started back on a few items that needed to get finished up. We put up all the insulation for the entire room. Using thick R-19 in the ceiling cavity. That should help a bit on the sound proofing, but more on that later as we will be installing some other materials that will help isolate the sound and keep things quiet down here.

Another one checked off the list was to move the hole for the toilet as it was in the wrong place. We patched the old one and it's ready to go for the new hole in the correct location this time please! Here it is after the patch work.
While I had some of the thinset mixed up, it was good to finish the seams for the floor with the fiberglass tape.