Stage 1.
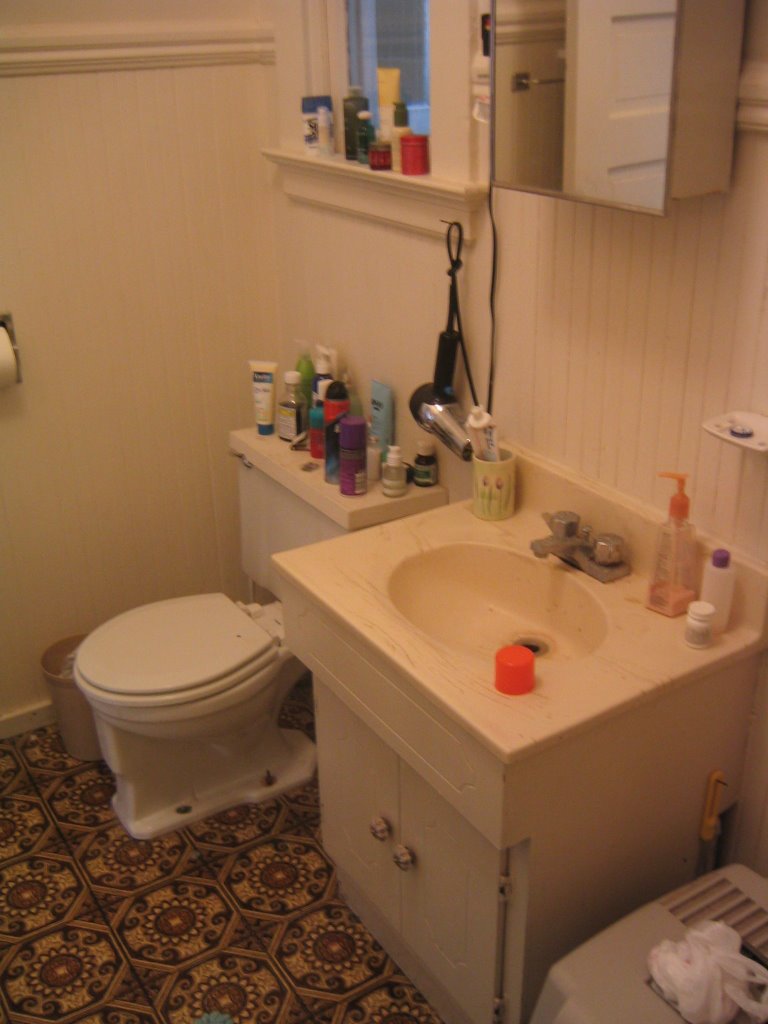
Here is my bathroom.. it's about as ugly as you can get. I would say that it was probably designed by someone with really poor eyesight while under the influence of LSD sometime in the late 60's or early 70's. The linoleum flooring is totally rad. The good thing about a bathroom like this is that there is really no reason to clean it. Just let everything build up a nice patina of yucky stuff.
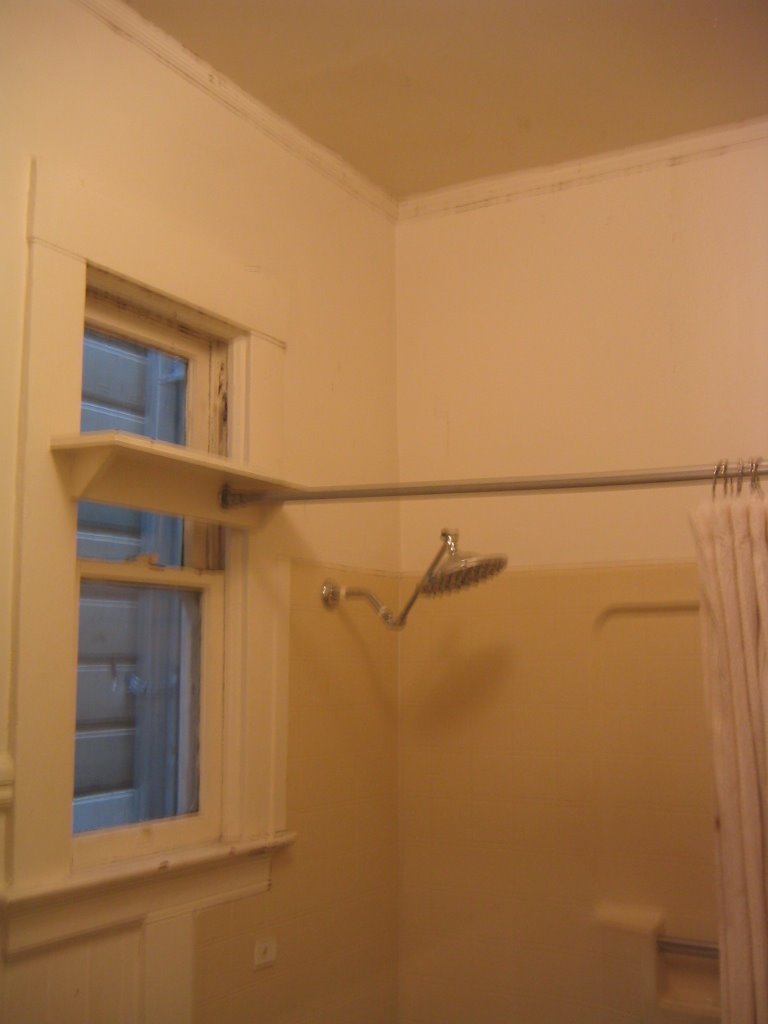
The careful attention to detail and design is evident throughout. Here we have the shower designed into the space of the windows. When faced with elements of conflict such as this, we can see that the designer chooses to make functional decisions. Curtain rod intersects windows? Add a multi-functional dual action rod support and shelf combo.. SWEET! I promise to do a much better job on planning out the space and how everything fits in the new and improved version 2.0.
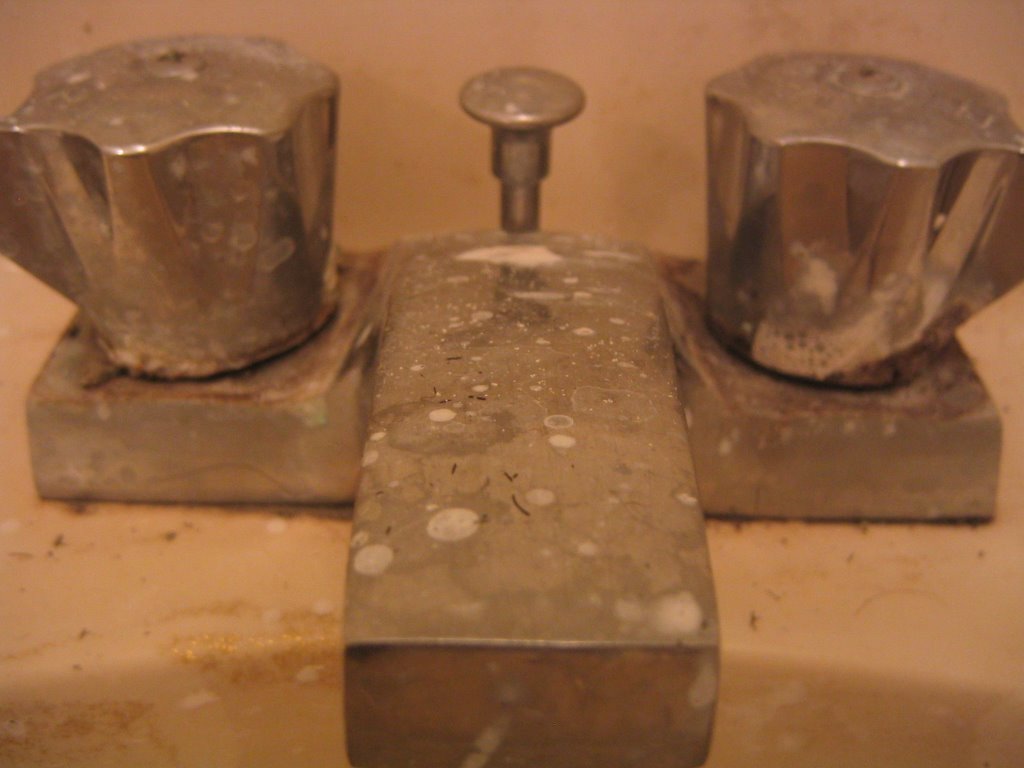
Detail of Yucky Stuff
Stage 2.
Dave's conversation with himself "Don't do this project yourself, you have already done way too much on this place yourself, hire a contractor on this one man.. just pay someone to do the job right and get it done and move one. It's a bathroom, you don't want it out of commission for an extended period of time.. just get it done.." I figured the process here would be rather easy. I actually met a guy a while back, a friend of a friend sort of thing. He was doing lots of construction work, pursuing his contractors license, and also starting his own business. I figured this would be a great opportunity for me to get a decent price from someone who would do a really good job. Not having to bid this out to multiple contractors would save me lots of time and headache as well.
Stage3.
Drawings, really good.. detailed drawings were a must. I had Jenny show me the ropes of Illustrator and I was off running. I now have a deep admiration for the Pen Tool and Bezier Curves. I have also found that the Smart Guides totally rock. In retrospect I would never want to design anything like this in Illustrator again. Having a 3D or CAD application is the way to go. There was just way to much work involved in moving and making adjustments in all elevations individually. I don't want to even think about the amount of hours I put into the drawings.. way too much!
Stage4.
Pick out tile and order all materials... Considering that some of the items still have not arrived and I ordered them about 8-10 weeks ago.... I would say that jumping on getting all your items in the queue early is a very good idea. It's always best to have things onsite to be sure of clearances and specifics on installations as early on in the project as possible.
Stage 5.
So the I did hire a contractor, I did have really good intentions.
Stage 6.
Demo out the old bathroom. :) I decided to do this myself as I have a lots of experience tearing down old construction. The beauty of tearing apart an old house like this one is that the walls are comprised of plaster and lath. This stuff is messy, heavy, dusty, dirty, ugly and depressing to deal with. The bonus of the bathroom was that over the plaster and lath in some places was an additional layer of gypsum board. Just another layer to strip away! The demo required a dumpster out in front of the house, I think that this cost me about 350.00 for the week. This is kind of pricey for sure, but it also includes drop off and pick up and all the permits necessary from the city. There is really no sane way to do this without a dumpster, unless you have a really big pickup truck and can make many runs to the Colma dumps. A total of about 2 days were spent ripping out the old stuff with the help of my new found companion and workhorse Jorge. There was one small minor mishap, but catastrophe was avoided. I was tearing out one of the walls near the cold water line for the toilet. The pipe snapped sending a hisssing stream of water out into the basement below. I ran downstairs and shut off the water main to the house and cut and capped the line. I couldn't believe how fast this water started to flood the basement. In the amount of time it took me to shut off the water main, the basement had accumulated quite a bit of water. Lesson learned... When working with live water lines, it's probably a good idea to shut off the water main first. Another good idea would to have shut off the main line, cut and cap the lines going to the bathroom and then turn on the main line again and continue to do the demo without worrying about a flood situation.
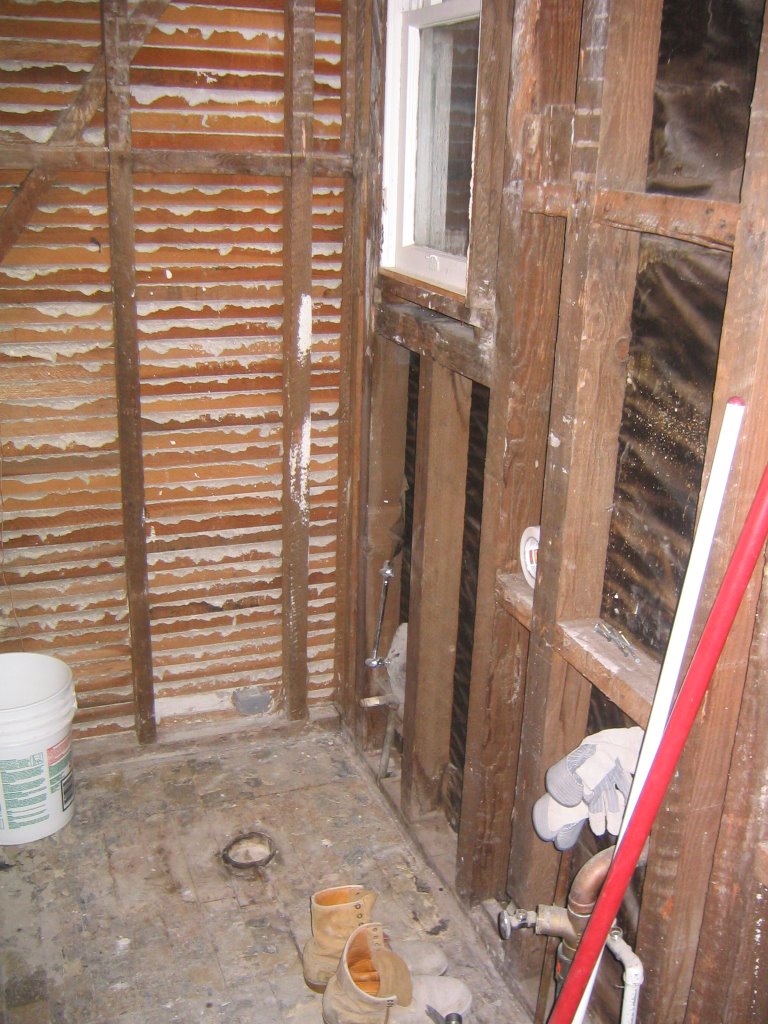
Taking a closer look, it turned out that the toilet cold water line was corroded and rusty and extremely fragile. These pipes were made from iron and not copper. The other really bad thing is that some of the iron piping was connected to copper piping. This is a bad idea as they can corrode each other.
After two full days of demo, it was nice to see the entire contents of my bathroom residing in the street side dumpster! I should have taken a picture of that as it was quite a milestone.
Stage 7.
Ok, call the contractor and tell him that I am ready to have him start. Bathroom is demo'd out, I have good drawings and most of the supplies, fixtures, tile are on the job site. Now I can just sit back, relax, and watch the job get done!
After lots of long delays in getting the project started, and to be sure these were delays were my own fault. Trying to pick out and get all the fixtures, tile, medicine cabinet, vanity, sinks, tub, blah, blah.. settled before the contractor started took much longer than I thought.
Anyway, to make a short story even shorter. The contractor spent a total of 4 days on the job site and only managed to accomplish a few things while eating up close to 1/4 of the total budget. Needless to say that wasn't going to work. Besides most of the things that he had done were incorrect and not following either the manufacture specifications or the details of my well thought out drawings.
What happened exactly?
The contractor that I hired to do the job ended up not doing any of the work and not really being around to manage the job at all. Basically, this seems to be the case of how things end up going. You hire a contractor and then he sends out his guys to do the work. Who are these guys, do they know what they are doing, are they clear on what they should be working on each day. Are they going to be doing things to your and the manufacturer specifications? A really good question to ask a contractor would be, "Are you going to be here at the job site every day to ensure things go smoothly? Do you have time in your schedule to give this job the attention that it deserves? or do you have a bunch of other jobs that are more important to you which means you won't be here very often and you really won't have much of an idea of what is going on." unfortunately the later was the case for me. We will get into the specifics of that a bit later.......
Bad things...
- Tearing out some of the rotting joists required adequately supporting the floor above while the work was being done. The contractor said that he would support the joists by using a very large and substantial wood or iron beam. The support used was a single 2 x 4. I guess his crew decided this was adequate. Needless to say that all is still standing... thankfully.
- Toilet flange hole for waste line in the wrong place.
- None of the wall studs were moved to allow the window rough-in or recessed medicine cabinet to be installed correctly.
- Plumbing was done using 1/2 pipe when all my shower volume control valves and thermostat values were 3/4". No consideration was taken to look at this stuff prior to doing the plumbing rough-in work. No consideration or questions were asked for the gpm ratings on shower system etc.
- Toilet plumbing cold water rough-in was in the wrong place. This would have ended up directly behind the toilet instead of 8" from the center line of the toilet as in the drawings.
- Hardi-Board for floor was being installed using construction adhesive. I have never heard of this application method. This was just plain wrong. The manufacturer recommendation is to install only using thinset applied with a 1/4" notched trowel. www.jameshardie.com After talking with some professional tile setters I have realized that there should have been at least a discussion regarding what the recommended sub-flooring method when using specific tile materials such as limestone and marble etc. Many of the tile contractors suggest mudding the entire floor "old school" style to ensure a faultless lifespan on the job. I hope that 1/4" hardi-board embedded with thinset, installed over 3/4" tongue and groove sub-flooring will be adequate. Time will tell....
- Hardi-Board flooring was not laid out on the entire floor surface. They stopped it short at the point of the tub area. This doesn't make much sense as you want to do everything to ensure a strong and level surface. The hardi-board should extend throughout the entire flooring area in an effort to achieve the best end result.
- Luckily I caught this flooring stuff midway. I had them pull it back up and re-install it correctly.


No comments:
Post a Comment