Tuesday, June 27, 2006

Tile day three.

Mark and Joe started early as usual, showing up at my house around 7:45. They are really moving quickly now that the layout has been established.

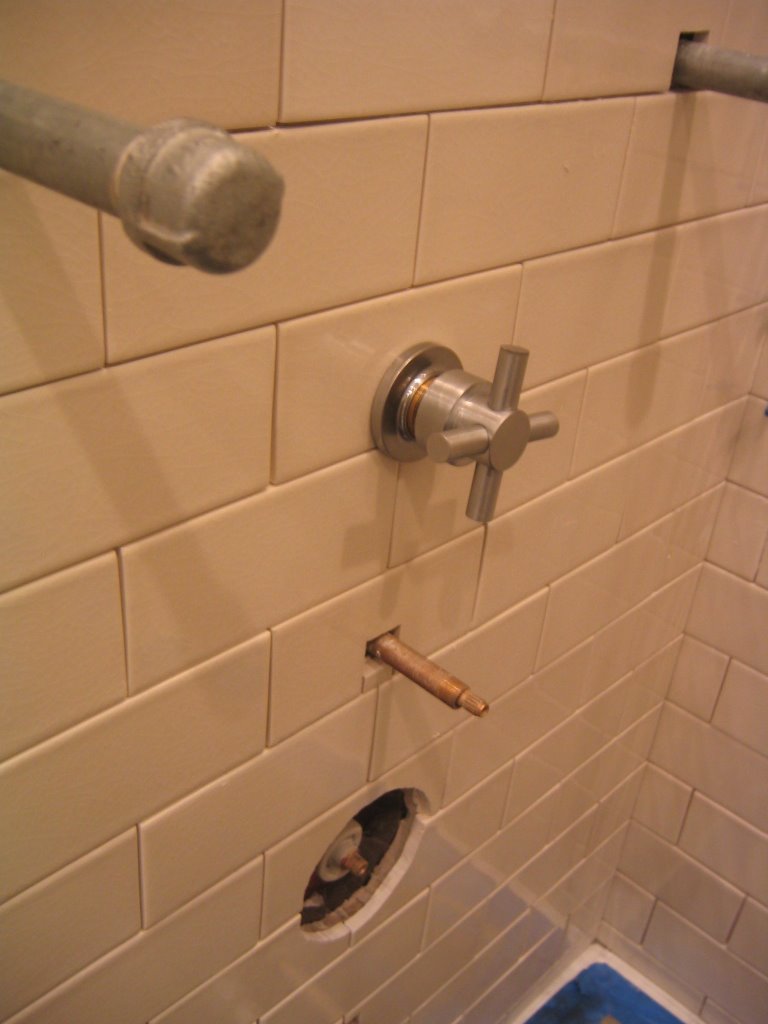
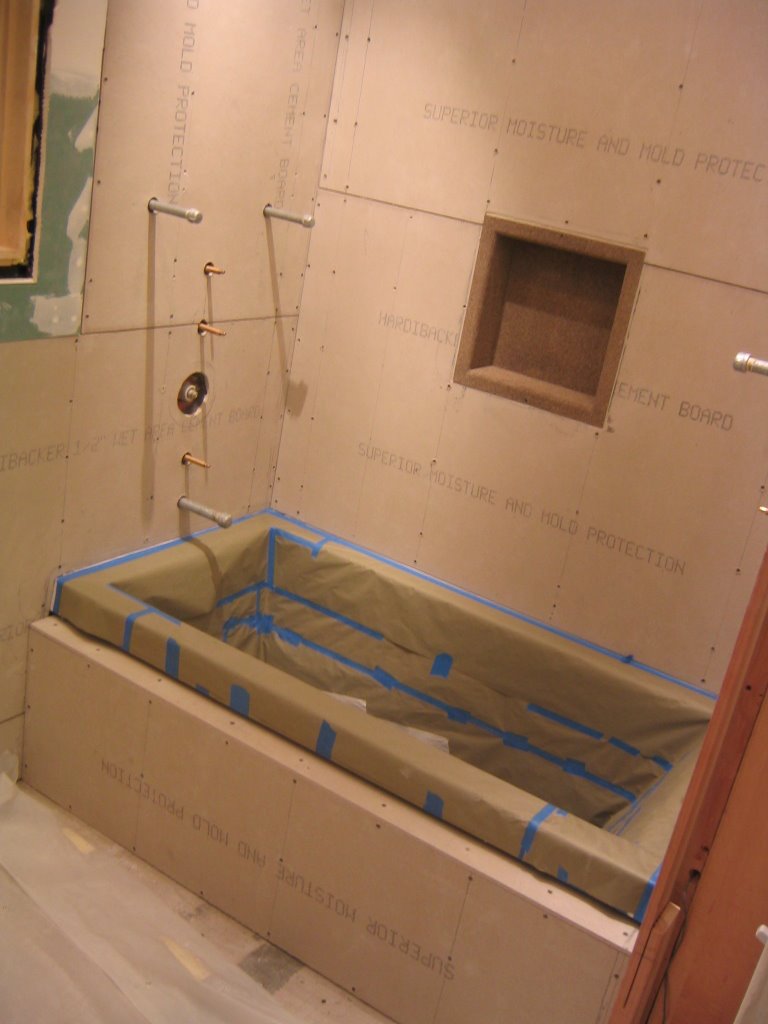
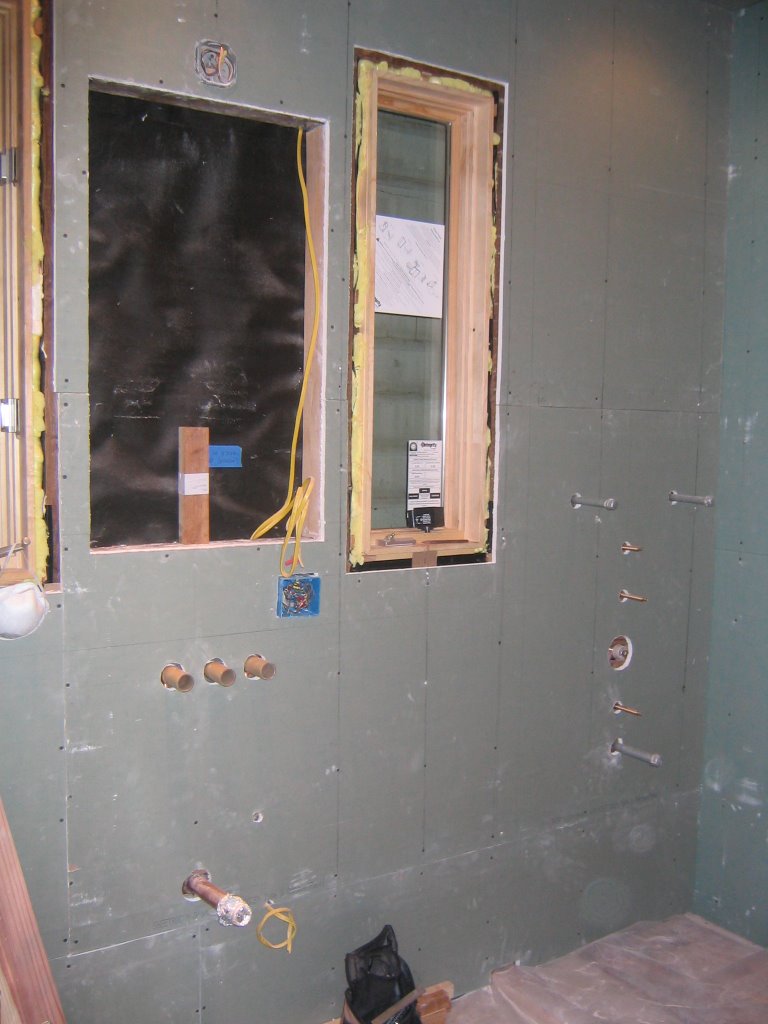
Here is the current view of their progress. Shower surround and shampoo niche starting to look good.

Wall has field tile and base tile in place, just need to put on the chair rail cap. The holes are for the faucet.

I couldn't help but try to get an early preview of what the volume control knobs would look like against the tile.

Monday, June 26, 2006

Tile starts.. hip hip something!

Mark, the tile guy started with the installation of the Nu-Heat floor warming mat. It's going to be totally killer to have a warm stone floor on those cold San Francisco days.... since that's about every day!

This is the detail of the thermostat probe installed into the morter bed. Nice job cutting a notch for the probe so that it sits level and the tile will lay nice and flat. The other wires are part of the heating mat and have already been installed and then morter applied on top.

Mark knows the in's and out's of all this which has been great. He even knew about the card for the Nu-Heat floor that needs to be signed at three steps during the installation. If you miss one of these checks... the warranty is void. yikes! Good to do it right the first time and have coverage just in case something doesn't work... which means pulling up the floor to fix it! Unlike my failed attempt with the contractor at the onset of this job.... in this case I finally feel like it's good to have a pro doing the work. That's about it for day one of the tile installation, not much else you can do except for waiting on things to dry.

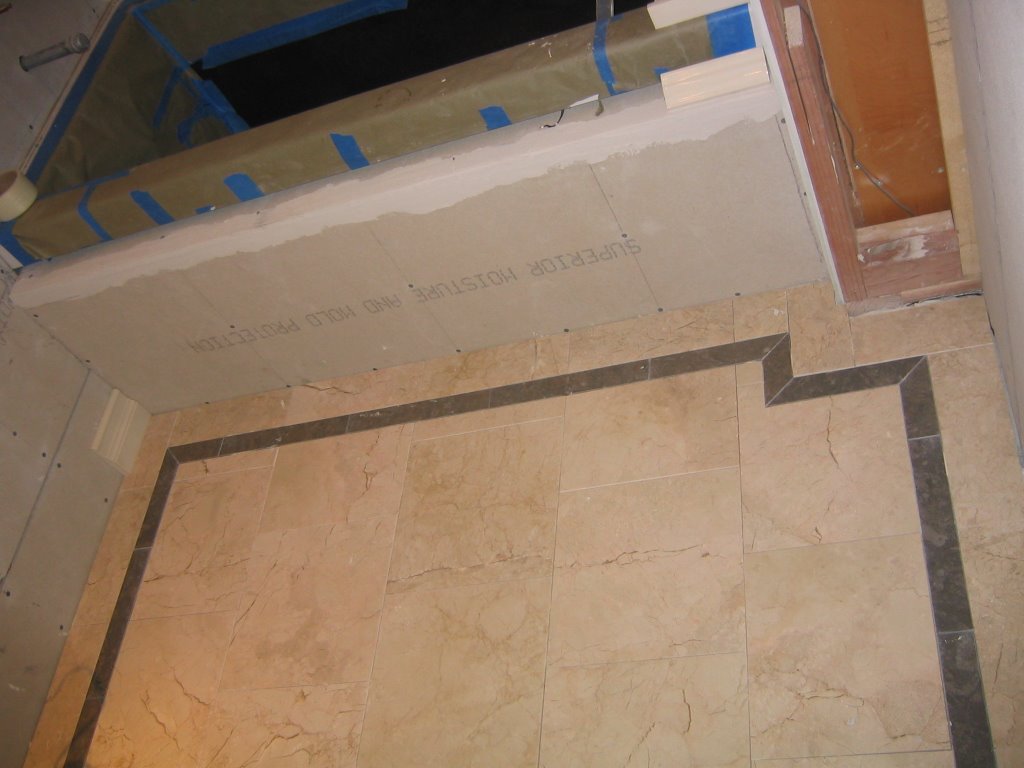
The second day consisted of installing the floor tile. The first step is to cut and lay it all out.

Here is the floor after about a days worth of work. All the floor tile has been cut and installed. Not too bad for one day... this guy is fast!

Another angle of the floor. The blue ring is the "water closet flange" It's great that its official name is something so elaborate.. why not just toilet connector or something like that.... :)

One more shot for good measure!

Sanding Drywall.. it's can get dusty.. start to install moulding


Finished up the drywall with 3 coats of mud and then sanding. I have hear of dustless methods of sanding, or wet sanding.. but I just wanted to get it done. All the sanding only took about 1 or 2 hours, but the results are very dusy.. yuck I hate this part.

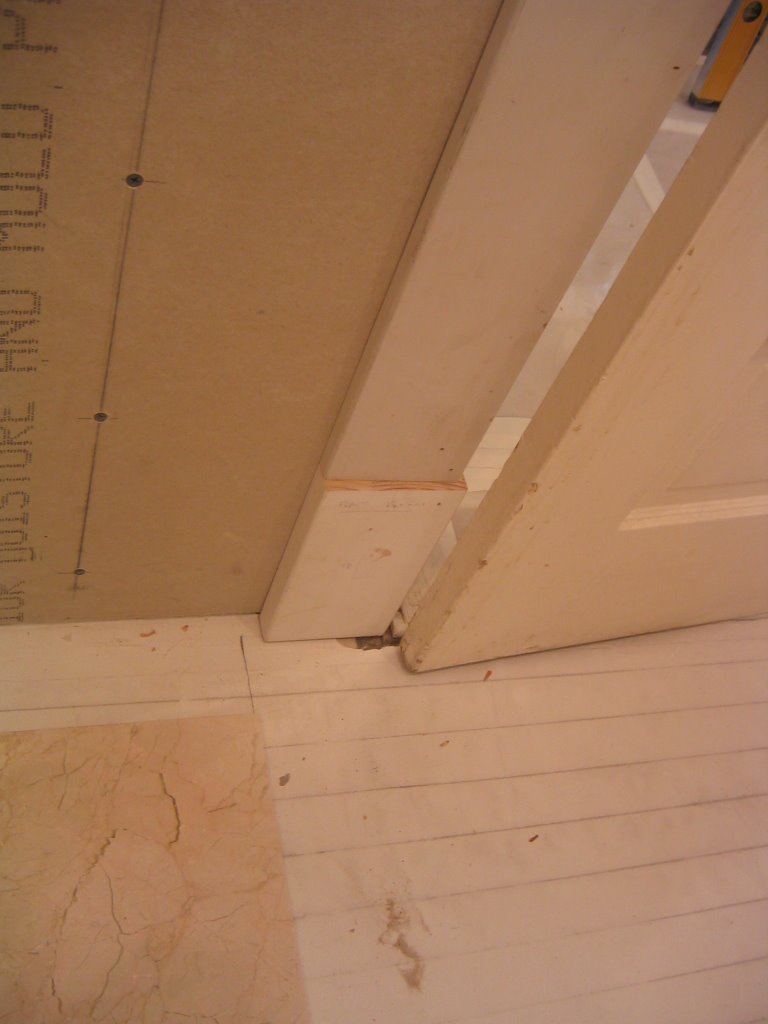
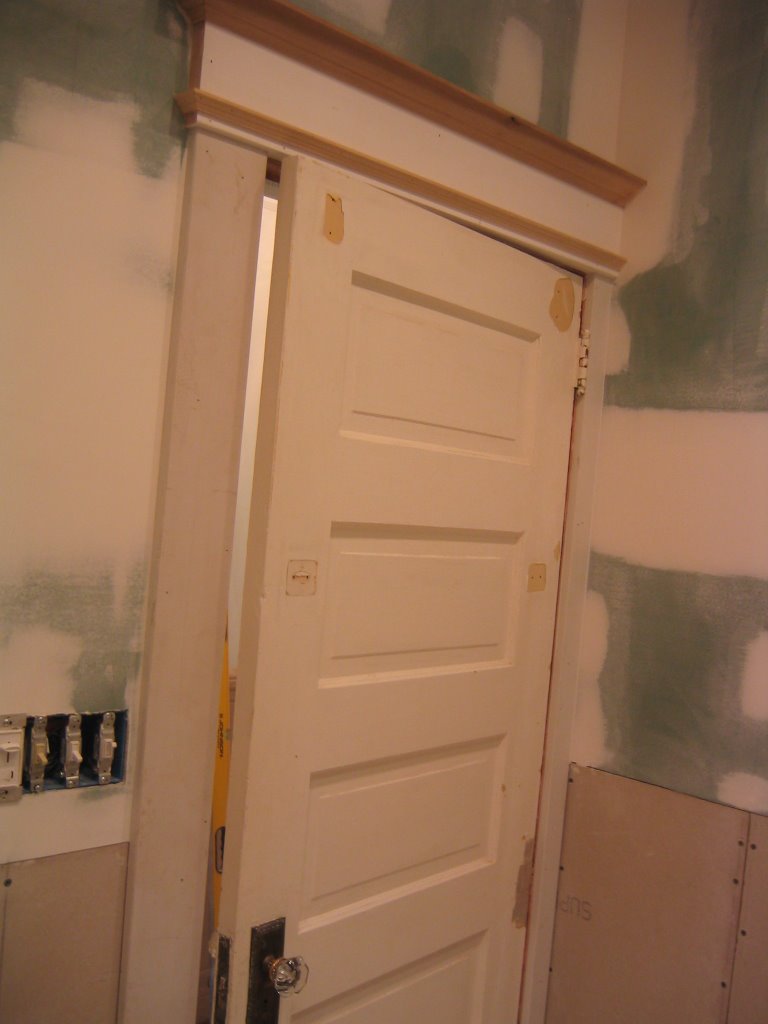
After the sanding I started the mouldings. It was necessary to get the moudlings done around the doorway and one of the windows to have something for the tile guy to butt up against. In the case of the window, I wanted to be sure that there was sufficient room between the bullnosed edge of tile in the shower and the moudlings around the windows.

I have done lots of moudlings already on the house so this is just a matter of matching what is already done in the rest of the house.

Here is the door detail.

and this is the window detail. Just one more window to go and then the crown. One of the most important steps to finishing off the mouldings is to fill all the holes with a wood putty and also caulk all the gaps to create a clean and solid look. It's amazing the difference that a bit of caulking can make to the overall look and quality of the project.

I splurged a bit on this buy purchasing a new miter saw. After lots of research and going to the store to try out a few models I decided on teh Bosch 4410L. It's a 10" slide saw with a laser guide. My old miter saw is just about dead and it's about as no frills as you can get. It does get the job done, but since it's just a 10" fixed miter, it doesn't do well with any lumber that it much wider than 4 1/2" in width. It's even worse when trying to deal with crown that should be cut at the installation angle in the saw. Flipping the wood and doing a double cut takes lots of time and usually yeilds an imperfect cut.

Thursday, June 22, 2006

Went to NYC...


Jenny and I went to NYC so needless to say that status of things on the bathroom haven't changed in a while. NYC was great, busy, vibrant, fun, lots of great things going on everywhere... it was hot!! really hot!! yikes! When do we go back??

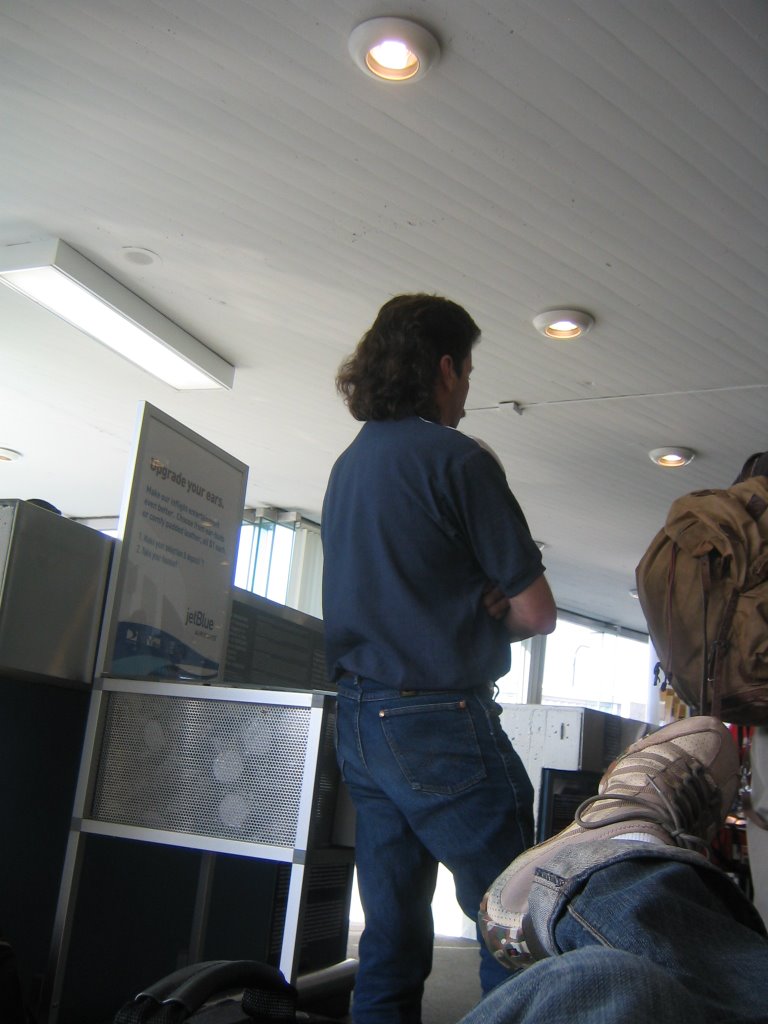
Some of the highlights of our trip included mayhem at the airport. We have mad mullet hair in front of us and behind was two crazy couples yelling to each other about how to use a cellphone and why men take less room in a suitcases than women. The guy kept saying "it's what you make of it... it's what you make of it..."

I did a bit more mudding and am getting close to 3 coats on the whole room. It's amazing how long the little details take. The little light slit area along with the recessed circle over the rain shower have taken so much time! So many corners and edges to detail out... The goal is to finish up on the mudding and sanding over the weekend and get all the drywall primed!

Another small issue that I ran into was with the rain shower extension. I ordered this from homeannex.com, the best prices with no shipping on orders over 75 bucks and no tax! Double check on all lead times when ordering. If you ask, they will tell you about how long things should take. They told me this item would take 2 weeks and it arrived in about a week. Wow! This was actually ahead of schedule.. that never happens! I went with the opella brand and upon it's arriving realized that it is a 3/4" pipe and not 1/2" uggg... I had roughed in the plumbing for the rain shower using a transition from 3/4" to 1/2" at the very top and finished off with a 1/2" ipc 90. The hans-grohe rain shower head is configured for 1/2" so I thought that this was the way to go. Opella also makes a 3/4" to 1/2" transition piece for the end of the rain shower extension kit. hmmmm.... I wish that I knew this earlier. I would have just roughed in the whole thing using 3/4" and finishing off with a 3/4" ipc 90. This would deliver the most water and the best shower. Now I have a few options to get this all working... will see how it goes and show the details later.

oh yeah.. the tile guy is really supposed to start tomorrow morning! for real!

Sunday, June 04, 2006

finished tub soffet and added the dot controller


Just had about a 1/2 of a day to work today.

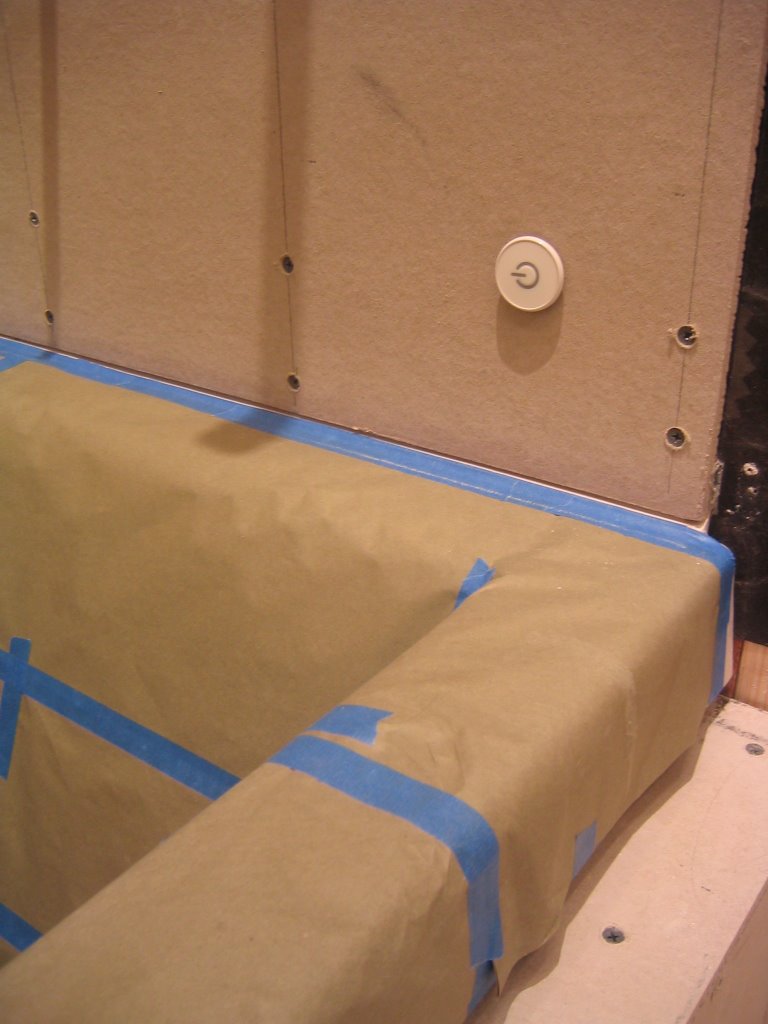
I got the tub soffet done and also added the dot control for the jacuzzi tub.

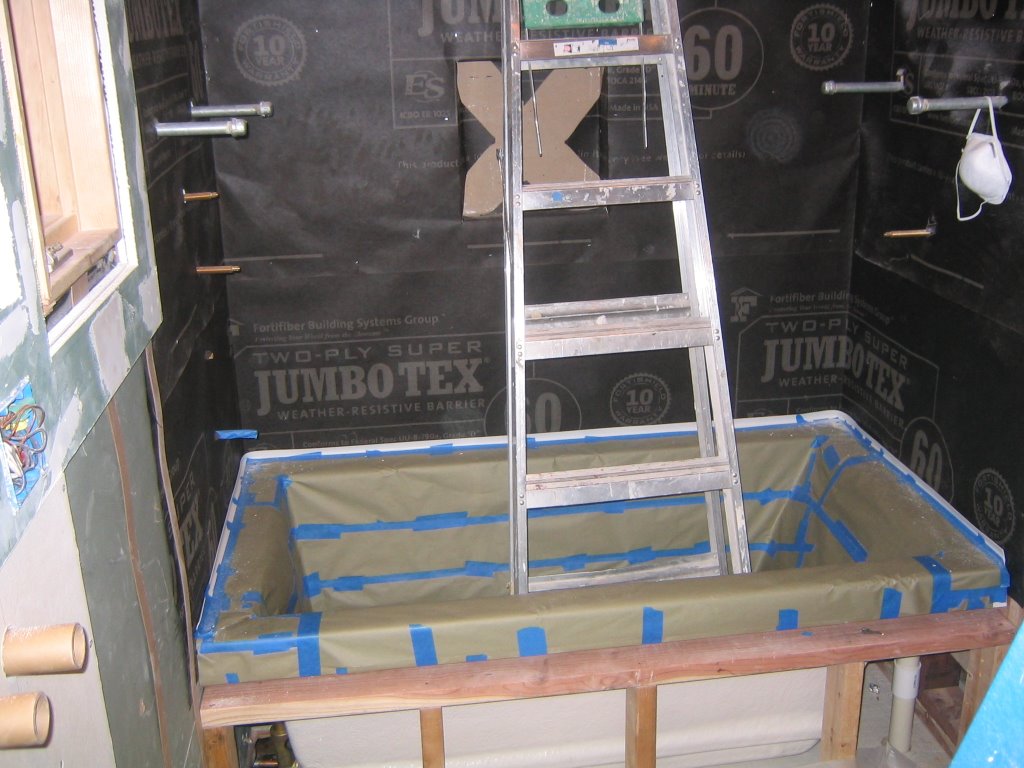
Here is the tub finally installed with tile flange, caulked and sealed. I covered up the tub so that it won't get any scratches during the rest of the project. The shampoo niche is also installed.

Another angle of the tub / shower area. The soffet in the front of the tub is also now done and ready for tile.

Here is the detail of the dot controller for the jacuzzi tub. I should have installed this much earlier as it was a bit difficult to run the wires at this point in the process. I was thinking that it would be installed on the exterior of the shower, but then decided it would be nice to have access to the controls while in the bath.

Everything is really close to being ready for the tile contractor. I hope that he can start this coming week. He said that it should take about 5 days to do all the tile work. I think that it's going to take much longer, but we will see! I'm not doing the work, so they can take as long as they want. :) Part of the tile installation also includes a Nu-Heat floor warming system. This will be super nice to have warm tile in the morning!

drywall in... cement board starts... mud / tape starts..


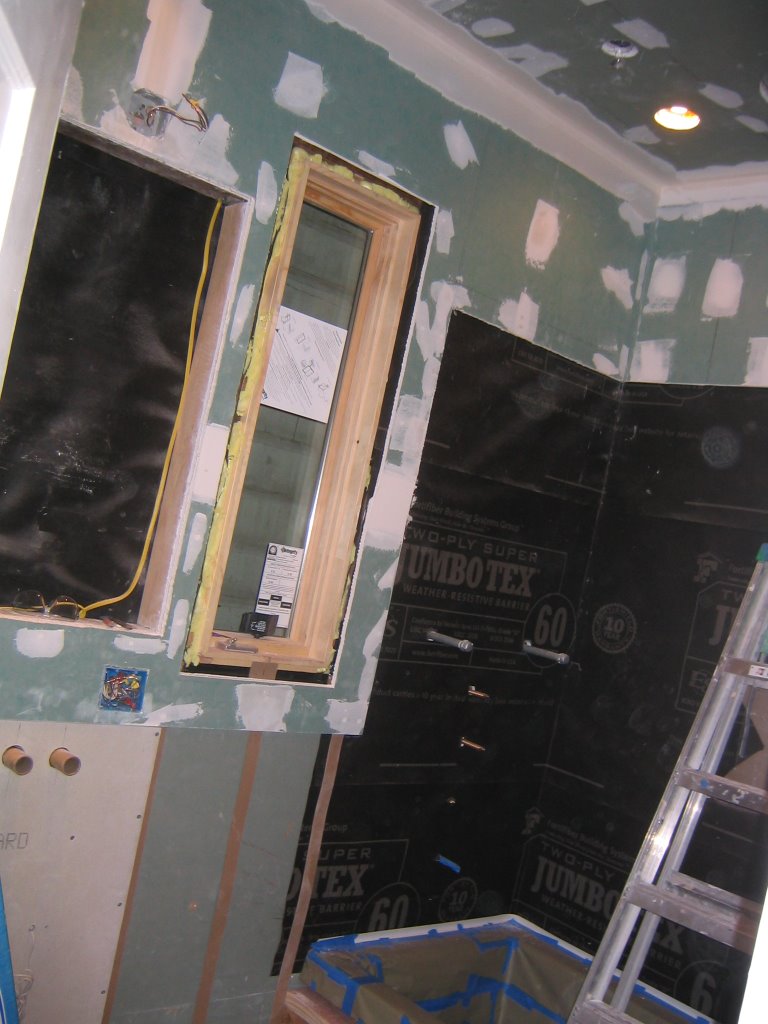
This is probably about 2 days of work since my last post and now the drywall is all in, and the hardi-board is also in. Finally glad to get all this work done which means that the tile guys can come and start their work asap!

Here is the shower area, very important to put a layer of construction paper, or moisture barrier before installing the hardi-board. In this case I used the jumbo tex 60 min. just tack it into place with some staples. Always use a 4" to 6" overlap between sheets! Overlap in the correct order.... top piece over bottom piece.

I also added some construction adhesive between the drywall and hardi-board layers. This is probably overkill, but this really makes for a strong solid bond.

I got a jump on the mud and tape stage. Here is what the first coat looks like on the ceiling and part of the walls.

The tub is in! This is the last and final time... no more taking it back out. We installed a tile-flange around the exterior rim of the tub to add an extra layer of protection so that no water can get under the tile. A bead of silicon caulking was also applied to the tile flange to adhere it against the wall.

Sunday, May 21, 2006

Drywall going in... and Ouch!


Took a few additional days off from work. Put in a few solid days of work and got quite a bit acomplished. Started the day off by installing the 5/8" drywall on the ceiling. Always do the ceiling first as the walls will butt up against the ceiling and help support it a bit. This was more work than anticipated due to all the recessed can lights. These take a bit to mark and cut out and ensure that they are in the right place. My technique for doing this is to use some chalk to mark each can light, then put up the drywall and put some pressure on it to transfer the chalk marking to the underside of the drywall. Just take down the drywall and you can see exactly where each hole should be cut. Here is the ceiling ready for mud and tape.

The walls are next.... The North and West facing walls require multiple sheets of drywall to ensure the correct thickness as well as keep the 2 hour fire rating adjacent to the property line.

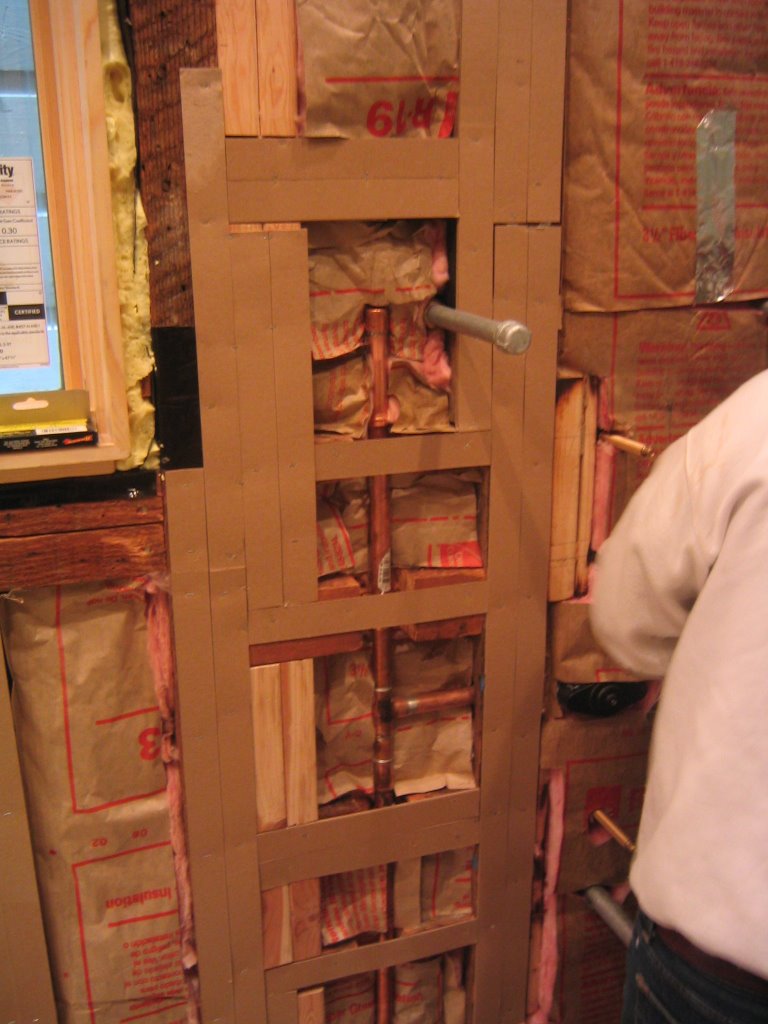
There was quite a bit of shimming required to ensure that the studs are all correctly alligned. Here is Jorge applying paper furring strips in the shower area. This is a really important step in the process.. it takes a bit of additional time to make sure things are all lined up but saves lots of issues in the end. Installing drywall into misaligned studs can not only lead to things being not being straight, but also cause the drywall to break when screwing it in.

More shimming.....

The cutout in the center of the windows is ready for the installation of the mirror / medicine cabinet. This cabinet is huge and it's 4" deep so it will provide lots of good storage space.

The next step will be to install all the cement board which serves as solid backing for the tile installation. I hope to get that started later this week.

Best purchase yet! I got this Bosch18V hammer drill from a seller on Ebay. It was a really good deal and worth every penny. I started using it and immediately it made my DeWalt 12V drill feel like a little toy. This is heavy, well built, powerfull and holds a charge all day long. I'm looking forward to trying it out on the cement board installation as that will be a good test to see how much abuse it can endure.

Stupid move of the week goes to me! I cut my finger while using a pair of scissors! Be carefull space travelers.. even sissors can do some serious damage.

Sunday, May 14, 2006

Weekend Continues... Acoustical ceiling installation starts.

Sunday Jorge is helping me out but I feel like my nose is about to fall off my face. I think that all this dust and stuff is starting to catch up with me... I can't breath out of my nose at all! YUCK!

Well, we have to start putting up the ceiling which is quite a bit of work, it's got sound absorbing materials and multiple layers / materials etc.. so that it helps reduce noise down here in the lower apartment. The good thing is that I have done this before so I know what I am doing. :)

Here is the plan:

Ceiling is already insulated.. that's one thing that we don't have to worry about today. YES!

Install the framing for the recessed circular detail above the rain shower. I added this detail to the drawings a while back. This should really nice as it's just a recessed 12" circular detail centered above the rainshower in the ceiling. Cut out a circle in a piece of 1/2" plywood and screw this into the ceiling joists. This will provide a guide as well as a place to attach the drywall. It's going to look ulta sweet!

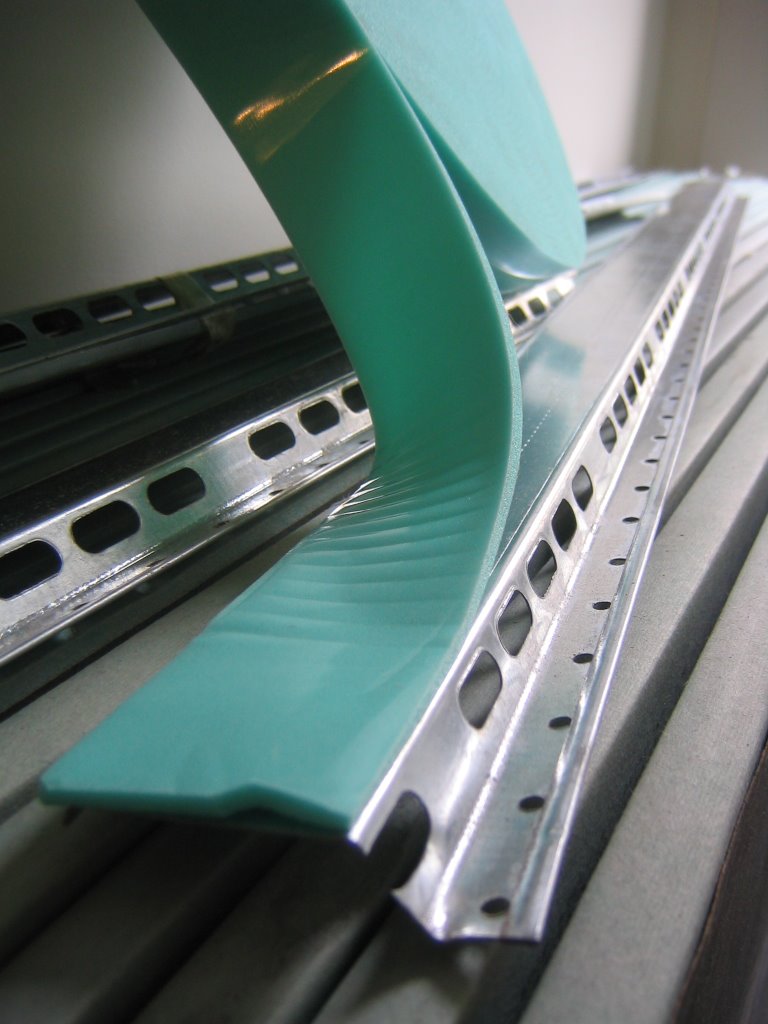
Install Resilient Channel or RC-1. Bascially this stuff disconnects the joists from the drywall by attaching the drywall to the RC-1 and not directly to the joists. This lessens the sound transmission and impact noise from the upstairs condo. So this picture shows the RC-1 and keep in mind that it's upside down in the pic. It screws into the joists spaced approx. every 24". It always installed perpendicular to the joists. Sometimes it's not possible to space it exactly 24" and this is the case with my ceiling as I have lots and lots of recessed lighting. I got it close enough though...

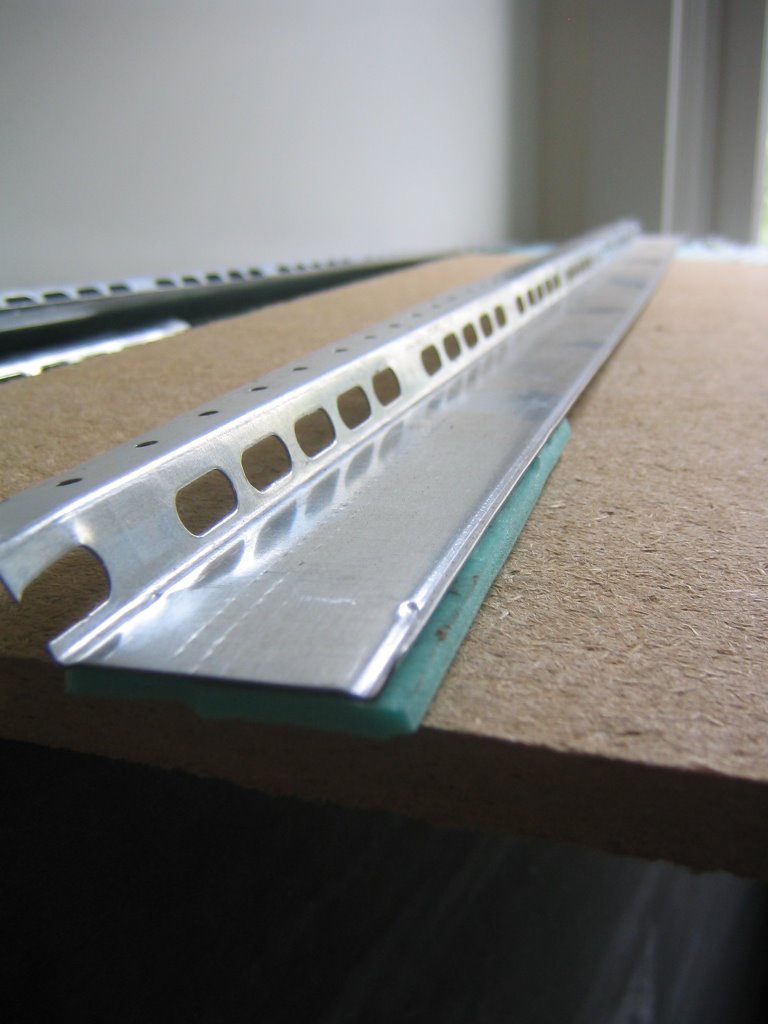
Install a sound absorbing adhesive foam strip to the RC-1. Ok, you can guess that this is super easy! Please note that this is just a demo pic.. it's upside down and in my case, the RC-1 was already installed in the ceiling when I did this step. This product is purchased separately and is "supposed" to help quite a bit. What the heck, it probably can't hurt?

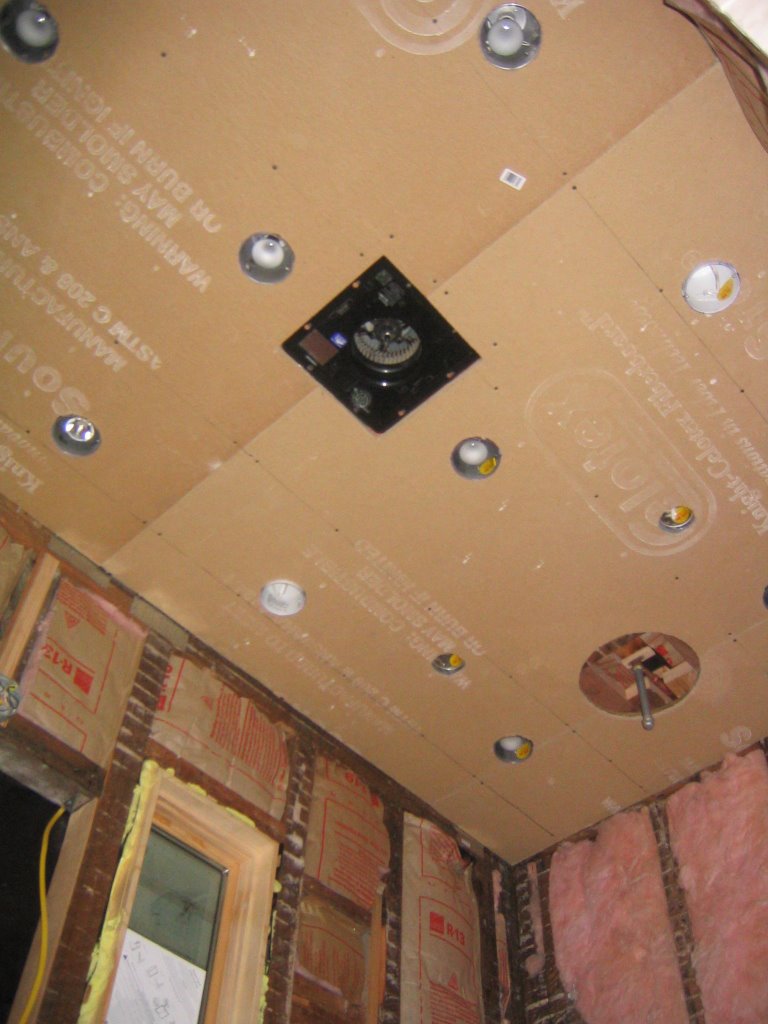
Put up the 1/2" sound absorbing board. This gets cut just like gypsum board, but not quite as easy as it's fiberous material that must be cut all the way through. Can't snap it...Not too bad though... really dusty so wear the mask and use a new matte knife to make it as easy as possible. Here is another demo picture just so no one is confused. This shows the correct orientation of the RC-1 Channel with the foam strip and the 1/2" sound absorbing board underneath. Now just use your imagination and see it all up on the ceiling.

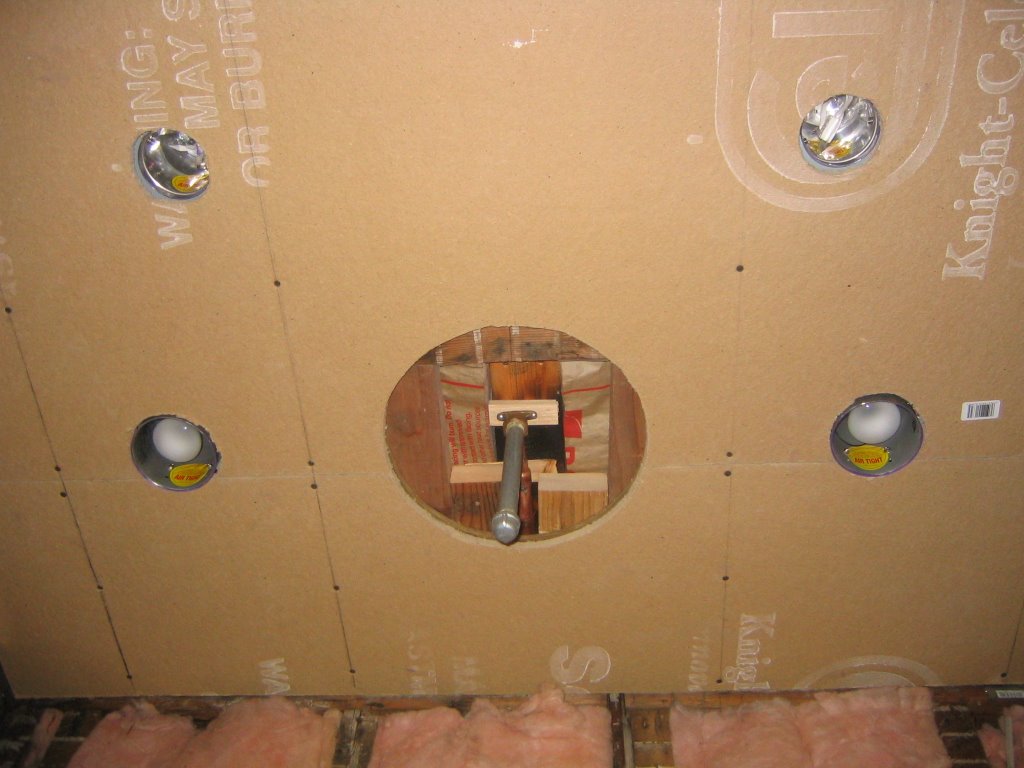
Here ya go. Oh yeah.. use fine threaded drywall screws and make sure they are just the right length. Long enough to grab the RC-1, but not too long! If they touch the joists, the wholepoint is shot.

Here you can see the rain head shower detail, might give you a vibe on what I am getting at.

The square cutout is just the exhaust fan rough open.

That's it for today.. next day will be putting up the 5/8" CoreX Green board... and that stuff is heavy! Gotta get some rest!

Oh yeah... Thanks for the yummi sandwiches Jenny! The day always goes better when my girlfriend brings sandwiches for lunch!! Jorge says thanks too!

Another weekend... 1/2 day of plumber on Saturday

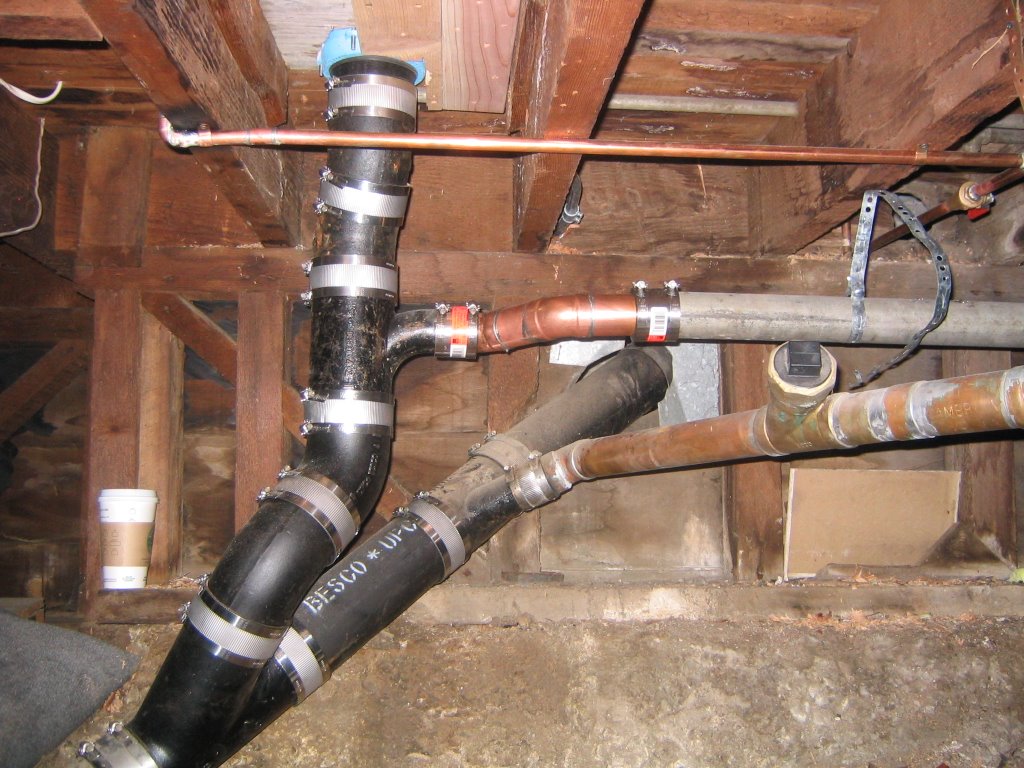
The plumber Phillip got drunk or something on Friday night which delayed his arrival on Saturday until much later than expected. Hey.. it can happen to the best of them and Phillip has totally kicked ass for me... so no worries.. it's all good. We are almost done, just need to hook up the trap for the tub and make sure that there are no leaks. Also need to fix one of the connectors to the volume control as it's leaking a bit. Here is the all waste lines and toilet closet flange, it's mostly all new stuff.

Note to self, or others who are interested: When connecting plumbing pipes that have threads, always adhere to the following rules. A. Use lots of tape on male threaded pieces.... about 5 - 7 turns of this stuff. B. Use lots of pipe dope on both male and female threaded pices. C. Tighten beyond what you think is tight! Use something to give more leverage like adding a long piece of temporary pipe. Failure to do this can result in leaky connections that are hell to fix once all connections are soldered.

Unfortunately this is what happened and we had to take some of the connections apart and fix and then solder again.

Phillip finished everything up in exactly 2 hours. Even with a hangover, he rocks!

In total, it took about 3 days plus an additional 2 hour day to get all the plumbing hooked up and all the waste lines run. Only about 1 more day to finish up and install all the fixtures and sink trap, but that's much later after the room is done and tile is all in.

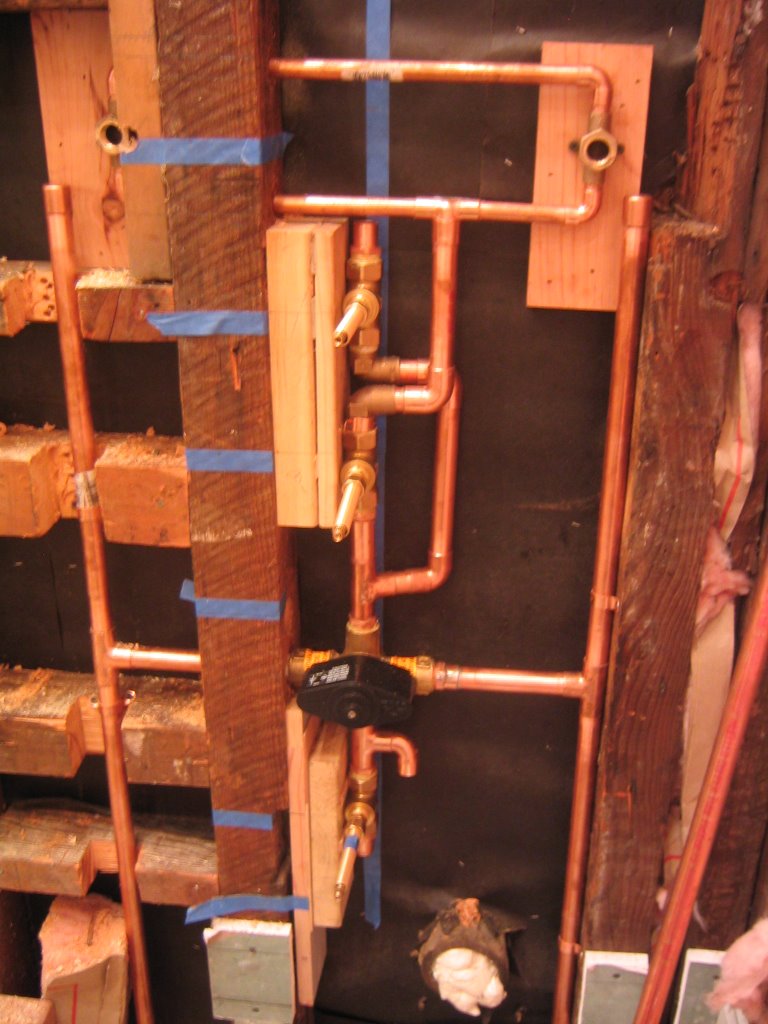
Here are the finished connections for part of the shower. It was quite a bit of work and then more tweaking to be sure that it's all straight, centered, lined up.

Tuesday, May 09, 2006

CLEAN Deeps!


Depot escaped and then came back all dirty.. not sure what happened exactly, but I decided to give her a bath and get her all clean and fluffy! I don't think that she is too happy about what is going on.

She was really good though.... didn't really fight it, just made some weird howling sounds every once in a while. She was glad when that was over!

Plumbing is not fun!

Things are ready for the plumbing work to start. I have designed a complicated shower system, so I assuming that this is going to be a bit tricky.

Larry my plumber friend from R&L Plumbing hooked me up with one of his plumber friends Phillip. I gave Phillip a call to see if he could start on the work to coincide with my day off from work. It's a good situation as I am able to pay Phillip directly for his work and get his personal rate vs. the inflated rates that would normally be paid directly to a plumbing company. I am also going to help out with all the plumbing work and my rate is totally affordable! :) I'm a good helper so I'm hoping that we can get all the work done in a day or so.

I was totally wrong with my time estimates for the amount of work required. Phillip and I worked Thurs, Friday, Saturday and still didn't finish. There was just so much work to do here. After looking at the situation he decided to cut out a big portion of the old waste lines to connect the new stuff much easier and cleaner.

Got the closet flange / toilet waste line in the correct position now!

All the new plumbing was lots and lots of work to figure out and to get soldered in place. Bascially it was like a puzzle and to get it finished took tons of time! The shower consists of an overhead rain shower as well as 4 body sprays, tub spout, volume contols, and thermostat. Getting all of this to fit inside the wall and to get all the holes in the right place was a serious challange.

A side effect of all this work is that my house is starting to look like a bomb went off. Here is my hallway during the plumbing work. UGG!
Ok..Ok.. Alright..Alright.. I'm way behind on my posts.. but that's because I have been really busy!!

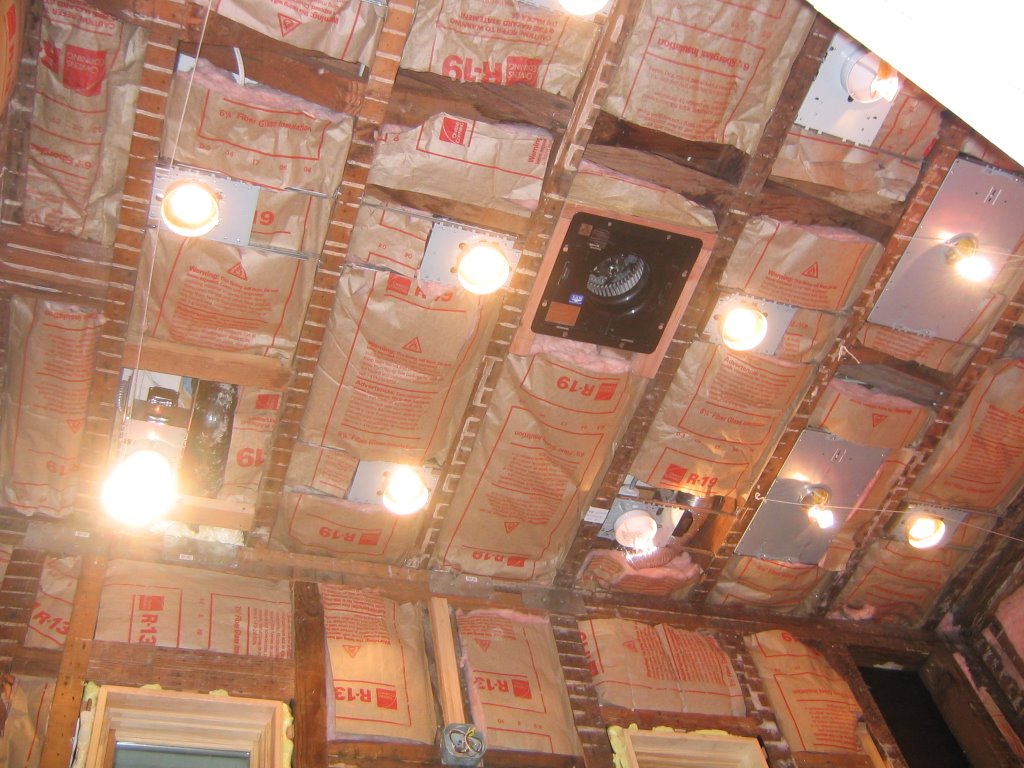
So over the past few weeks.. things have progressed quite a bit. After Howie took care of the electrial work, all in one day! That was fast! Jorge and I started back on a few items that needed to get finished up. We put up all the insulation for the entire room. Using thick R-19 in the ceiling cavity. That should help a bit on the sound proofing, but more on that later as we will be installing some other materials that will help isolate the sound and keep things quiet down here.

Another one checked off the list was to move the hole for the toilet as it was in the wrong place. We patched the old one and it's ready to go for the new hole in the correct location this time please! Here it is after the patch work.
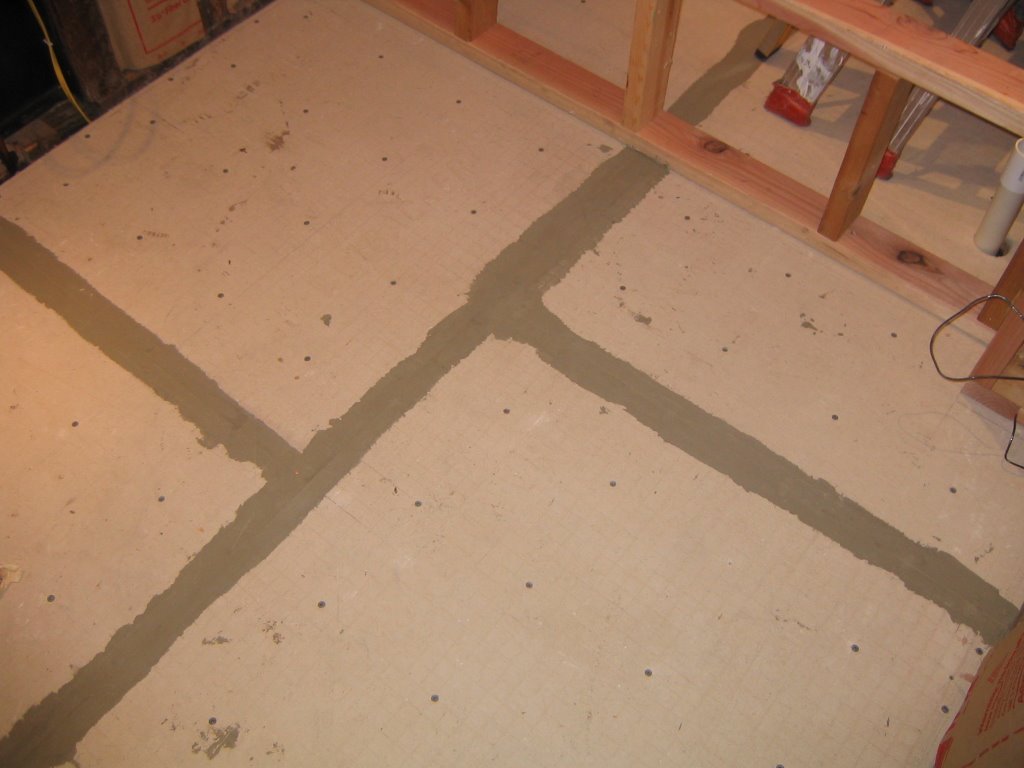
While I had some of the thinset mixed up, it was good to finish the seams for the floor with the fiberglass tape.

Thursday, April 20, 2006

Thursday AM before work.... Electrical starts

The electrician consisting of my neighbor Howie and his friend / co-worker Jake and some other guy showed up at 8am to start the electrical work.

They said that all the work will be finished today. I should be able to come home and find that it's all done! It's nice to have other people doing the work at times.. that's for sure.

All that should be left is a few additional things to connect and I'll be good to go.

Sweet!! they did finish today! I got home and it was all good! Nice job Howie and Jake and crew!

Weds day off from work means day of work at home

Jorge and I got to work in the morning checking a few more things off the list. I will be adding photos later!
  • Routed out the stud in the wall to lower the box for the light fixture above the mirror.
  • Cut out the old waste line for the toilet. There is a bit more work here since the toilet hole was cut out in the wrong place. I don't really understand why the contractor decided to cut the toilet hole in the floor so early in the process. Rule of thumb #210.5 Always leave this stuff until much later. Many things will change that will ultimately effect the placement of fixtures etc. Cut out the hole in the floor when you are sure where the hole will be. Cutting in the wrong place triggers lots of additional work to fix the mistake plus the additional work of cutting the hole again. Yucky
  • Framing of wall behind the tub. This got complicated as there is a design element built into this wall providing a small slit of light through a portal in the wall. Nothing seemed to go right... it was very frustrating to say the least.
  • Additional supports added to wall to provide support for the glass shower door.
  • Finished adding electrical boxes to get things ready for electrician tomorrow AM.

Monday, April 17, 2006

Air Compressors and moving a life to Vietnam

In my quest to find an air compressor that actually works, I took another chance on trust and faith in the goodness of humans. Craigslist provided yet another oportunity to purchase a slightly used unit at a very good price as compared to new. I also have been thinking quite a bit about the impact of my purchasing of "things" on this planet. Purchasing something used helps cut down "just a little bit" on my impact to this whole delicate system. I was thinking about buying a new one, but then I started pondering about the process that triggers. Purchasing, packing, the distribution of that unit to my house via UPS or whatever, the packaging materials and all that associated waste.. uggg... Instead of introducing something new into the system why can't I just re-use something that has already gone through that whole process already.

I met this guy named Hong who was selling lots of stuff. The compressor looked great, he started it up and even used it to shoot a few nails to show me that it worked fine. He showed me nail guns, nails, saws, sanders, dust collection systems, drills, and so many things that he wanted to sell. I asked him, "Why are you selling all this stuff" He replied, "I am moving to Vietnam"

I was really surprised at his answer but even more surprised by what he mentioned next.

I asked him, "What are you going to be doing in Vietnam? Why are you moving there?" Without hesitation he replied, "I am going to be a farmer."

He proceeded to tell me more about how he couldn't sit in an office anymore and basically it was not a proper existence of life and living. He wanted to go work with the land and with people to try and make things better. He told me that he also had hopes to save some animals that are treated quite poorly or even used for food and other medicines especially in Northern Vietnam. Many of these wild animals are endangered and he wanted to help try and change the way that people thought about these creatures of the earth. He talked about a golden eagle and a little monkey that he saw when he was in some market during a recent trip back to Vietnam. He told me that he wanted to purchase these animals and bring them back to his farm and then hopefully one day he could release them back into the wild.

My feelings about the inner goodness of most people has now been restored thanks to a guy named Hong. We talked for a bit more about life and what is living. How most people from the United States don't like to challenge themselves and only like to travel when all the comforts of home are guarenteed. We said goodbye with sharing email addresses and I told him that I will email him if I get the chance to travel to Vietnam. I have always thought that a trip to South East Asia would be awesome, and now I am thinking that it would be even cooler to see Hong on his farm taking care of his Eagle and Monkey.

Sunday, April 16, 2006

Weekend April 15th and 16th

Saturday got a bit of a late start... needed to sleep!

The goal of this weekend was to get all the stuff ready for the electrician to do his work during the next week. Basically that meant to get all the electrical boxes placed and account for all the fixures and where the switches would be placed. Also a few additional things were on this list.

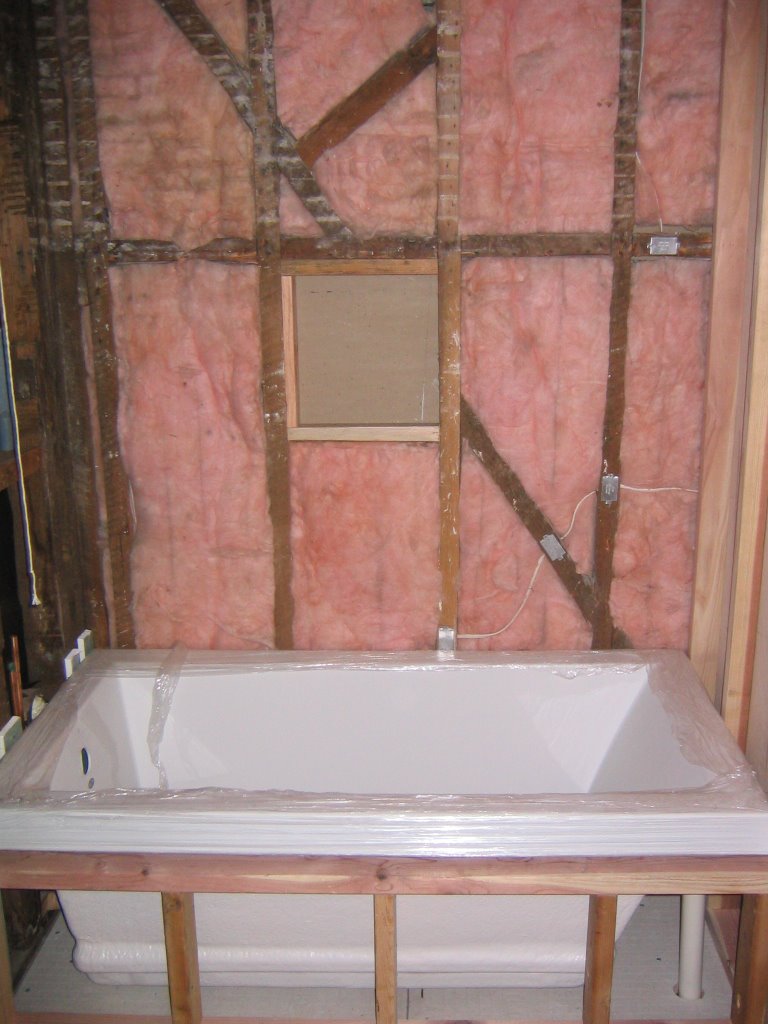
After realizing that there was not enough depth in the wall to fit the shampoo niche...uggg.. Jorge and I moved out the tub and framing an additional inch to provide enough room. Good thing that we didn't really nail all the framing securely. I kind of figured something like this would happen so we only used a few finishing nails and screws that can be backed off easily. I'll use the big 3" framing nails later when I am sure that all is going to stay where it is!

First had to remove one of the diagonal wall supports and then you have the frame ready for the installation of the metal shampoo niche unit. That will go in later after all the cement board and moisture resistant drywall.

The next project was to install the blower for the tub. The installation instructions mentioned that the blower should not be installed in a closed location due to overheating. It's also a good idea to have easy access just in case servicing of the unit becomes necessary.


After lining everything up, we drilled a small pilot hole for each. I had my fingers crossed hoping that the holes were clear of obstructions and floor joists. We got lucky on this one and all was clear. We drilled the larger diameter holes with a hole cutting saw. It took a bit to get through all the layers of cement board and subfloor etc.

The second step was to mount the motor in the basement. This was easy enough, just put in some 2x4 framing and then a piece of plywood on top. Mouting the motor was done with just two screws.

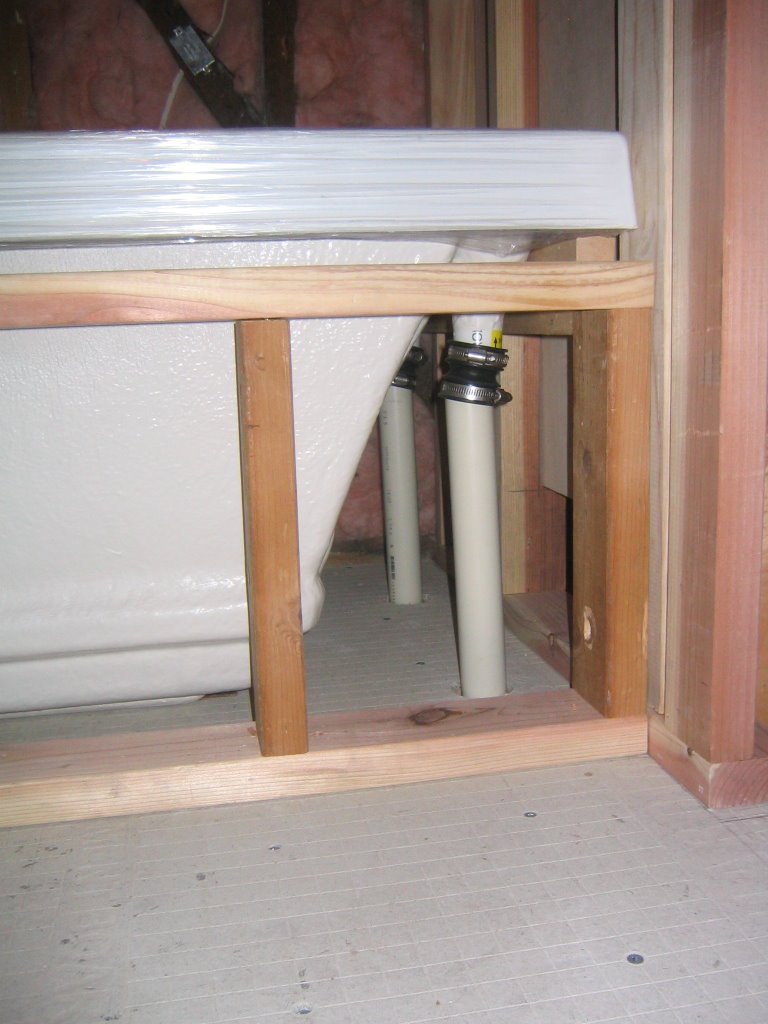
While we were making holes in the floor, we put in the hole for the tub drain. This was done with the 4 1/4" hole saw.

Jenny brought us Mexican food for lunch! Sweet time to chow! Thanks Jenny!

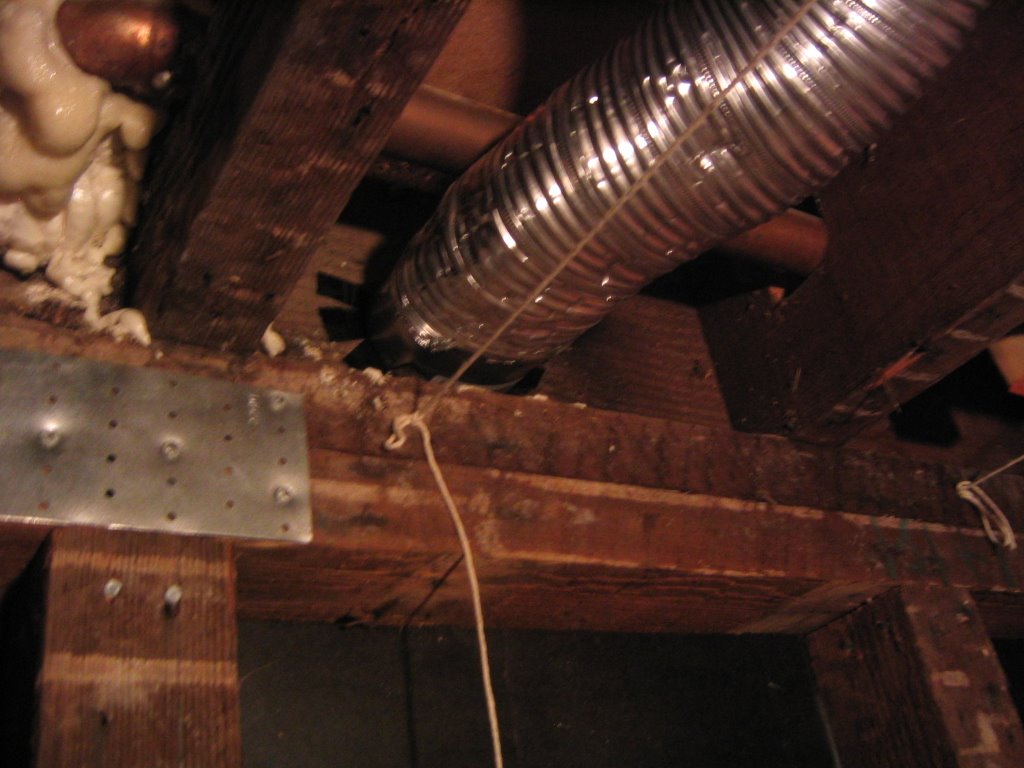
Now to put the ceiling fan exhaust in... This required drilling a 4 1/4" hole in the celing joist to install the louvered vent cover. After drilling a pilot hole, we found that a waste line pipe was obstructing thing on the exterior of the house. We decided to move the location over. This new location was clear on the exterior for the louvered vent but required putting another 4" hole through a joist. This joist already had a large notch in it so we didn't feel that bad by making it a bit bigger for the vent pipe.

I used the sticky plastic membrane flashing material to line the hole in the wall. This stuff makes sure that no water will get in, it's crazy sticky!

On Sunday I ended up just working by myself as there wasn't much heavy lifting to do today. I had to get all the electrical boxes installed today so that the electritian could do his work during the coming week.

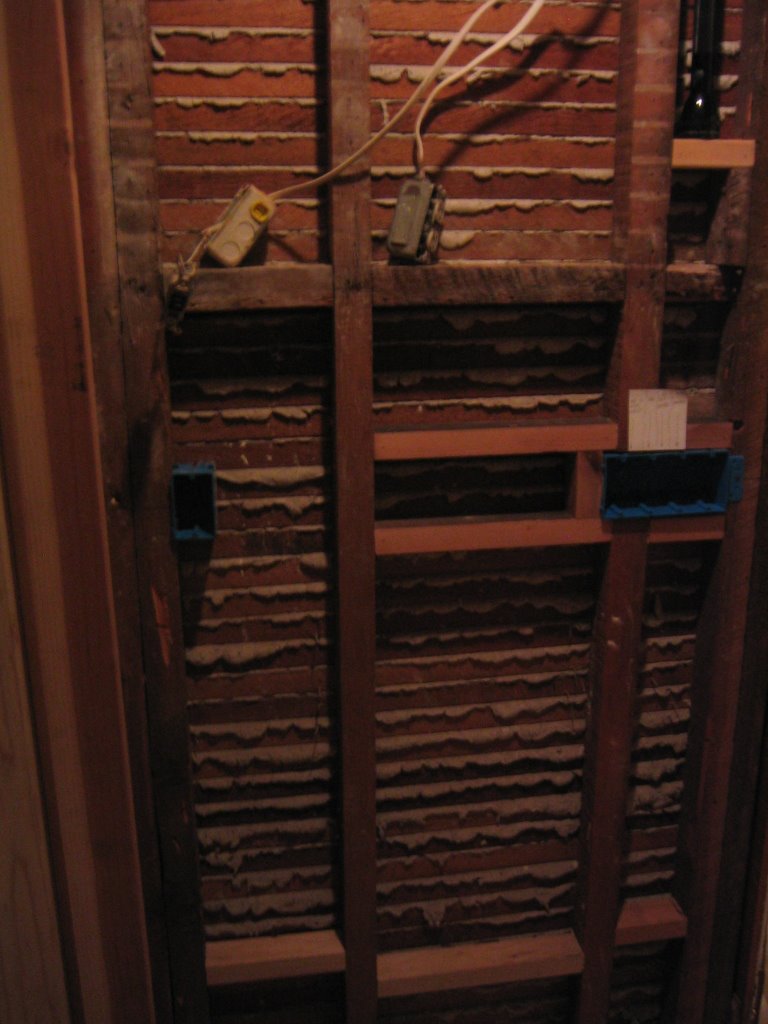
First issue was that the switch box as you enter the bath was to be placed right where the wall stud was.. uggg! To make matters even more compicated, this is plaster and lath and the other side of the wall is the hallway. This stuff is super fragile... I had to be ultra carefull removing the piece of stud required to get the 4 gang electrical box to fit in there. I cut the stud very carefully by hand with a pull saw. These things are really great and have gotten me out of a jam more than once. Once I cut through the stud in two places I could carefully remove the piece without disturbing any of the plaster and lath. There was only a few small nails to worry about, other than that it came out quite easily. Here it is all done.. the white piece of paper is just a note for the electrician.


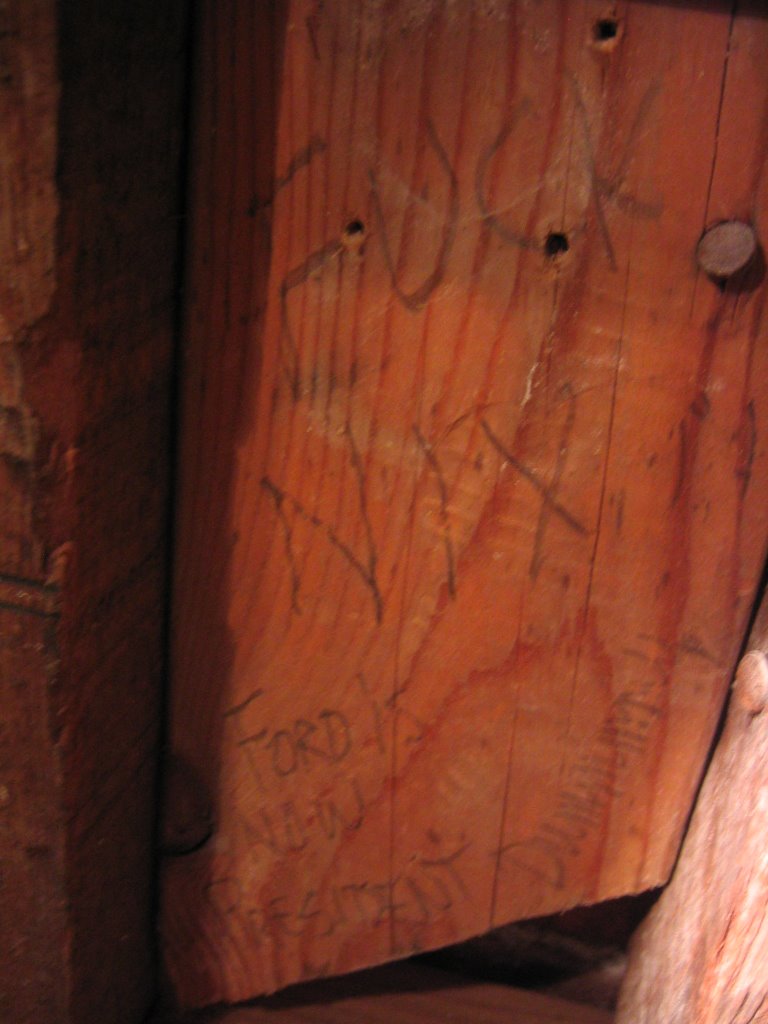
This is a bit of a weird random one... Behind the existing light switch, I found a little reminder of the past. Someone had written on this piece of wood. "Fuck Nix Ford is new president Dummy" Hmmmm.. who knows what you are going to find when remodeling an old home. This was a precious little jem of a find for sure, probably written in 1974 or so.... It incorporates a sense of humor, personality, and clearly a time in history reflected in the not so elegant words of a disgruntled citizen. Wow... seems like things never change! Here we are in 2006 and I feel like writing the same thing about our current president. Guess I will just have to wait for the "impeachment" errrr... should I say the proper term of "resignation?" and then I can leave another little note of my own.

Finished adding a few extra pieces of wood to get the exact rough opening for the mirror / medicine cabinet. Installation of this should be easy enough and now I am sure it will be centered perfectly.

The electrical box for the light fixture above the mirror was screwed into place. I also notched out the 2x4 support just below the white square piece of paper in the photo. This is to allow the necessary amount of depth for the outlet box. I didn't have a 2 gang box... will have to install that one later this week.
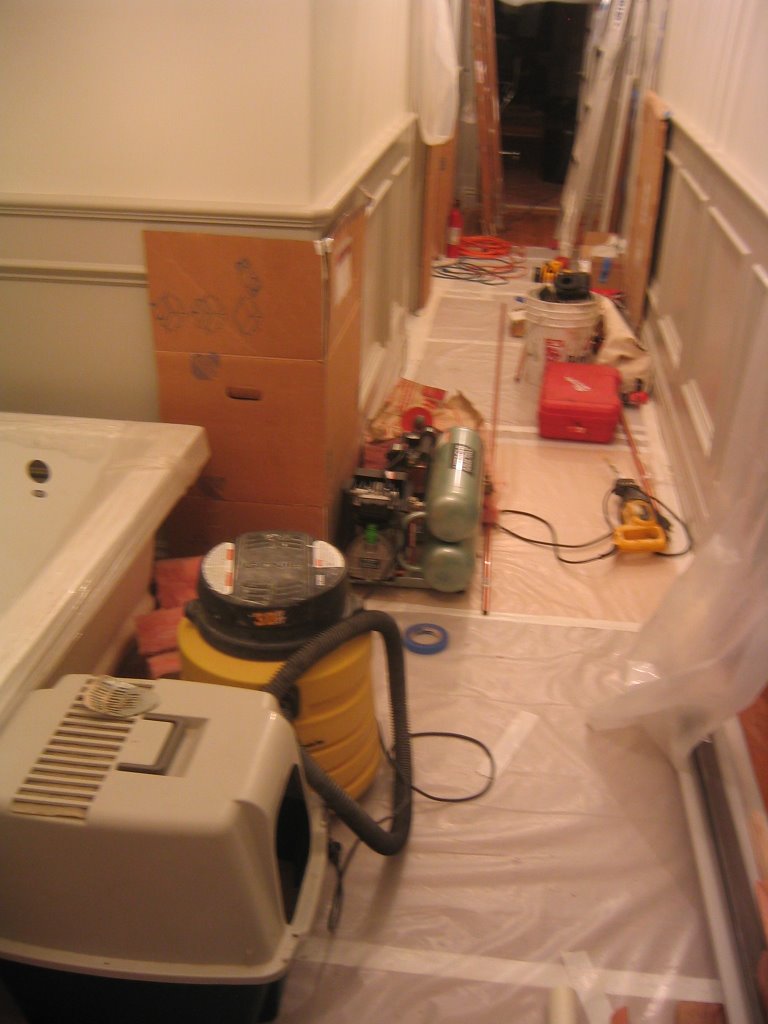
I also installed the rough pluming for the faucet. You can see it between the two horizontal 2x4's. This is a Kohler unit that sits inside the wall. When the installation is complete all you will see is the handles and the spout! That should look really nice.

That was about it for this weekend... Everything should be in a good enough state for the electrician to start roughing in all the electrical this week. The goal is to get the plumber to come in next weekend to rough in the plubing. Once this is done I can start to hang the ceiling. The installation of the ceiling is a bit non-conventional as it wil be done to provide sound proofing from the upstairs unit.